

Chatbots basics
Last updated February 7, 2025
Overview
Chatbot workflows are like friendly robots that talk to your customers. They answer questions and solve problems without needing a human every time.
Create a chatbot workflow
Go to the ‘Chatbots’ section in the hamburger menu and click ‘Add Chatbot’.
Initial setup
Once you click on ‘Add Chatbot’, you will see a new screen with this pop-up:
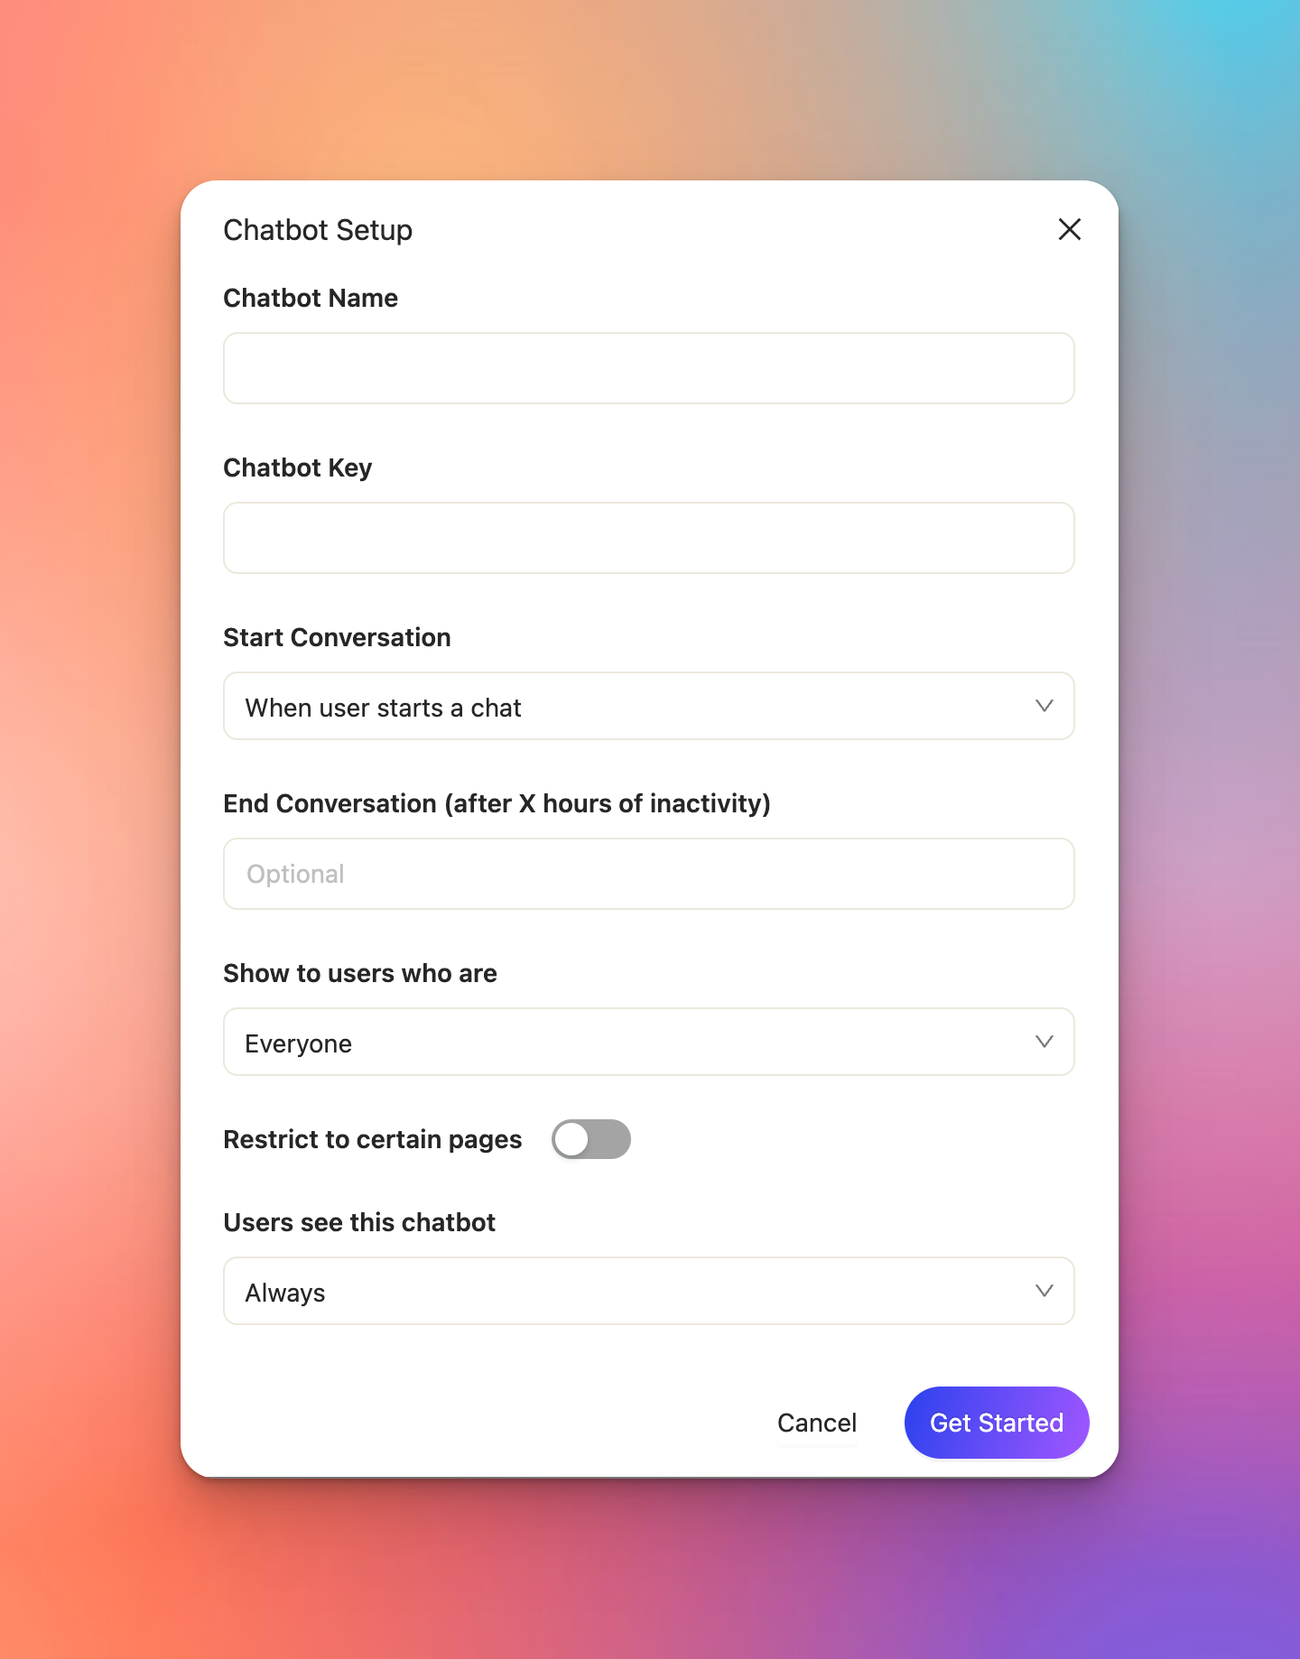
Give your chatbot a name. Add a chatbot key if you'll be using a code workflow via SDK.
Trigger settings
You can choose when to trigger the chatbot—click on the drop-down menu in 'Start Conversation' and select your choice.
Specify when you want this chatbot workflow to kick off. It can happen immediately when a customer encounters this widget, when the user starts a conversation, when the user clicks on something on the page, or via code through the SDK.
End conversation after inactivity
If you would like to automatically close tickets after a period of inactivity, you can set the number of hours in the ‘End Conversation (after X hours of inactivity).‘ If this field is left empty, tickets will never automatically close.
Audience selection
Click on the drop-down menu in ‘Select users who are’ to choose who can see this chatbot workflow. By default, it's everyone, but you can specify a specific group of customers or customer segment.
Page restrictions
You can also restrict the chatbot workflow to specific pages. Enable 'Restrict to certain pages' and give the URL to specify the page.
Display frequency
Finally, determine whether you want users to see this chatbot every time they go to a page with these conditions, only a certain number of times, or only the first time.
Chatbot blocks
Block by block, we’ll learn how to build a great customer experience.
Adding a block to a workflow
[image of the chatbot editor palette and clicking + holding a block]
To add a block to your chatbot workflow, click and drag the block from the chatbot editor palette to the canvas.
To connect blocks, click on the node or dot at the right side of a block. Click and drag to create an arrow, and place it anywhere on the block you want to connect to. Importantly, don't put it over the dot of that block, but anywhere over the main body.

add the dot to the box, not another dot
Note: don’t drop the arrow on the dot at the right side of another block as this will not connect the blocks.
not this please
Delete a block by clicking on the block and pressing Delete (or Backspace) on your keyboard or by clicking on the vertical ellipsis (”…”) menu on the upper right hand side of a block and clicking ‘Delete’.
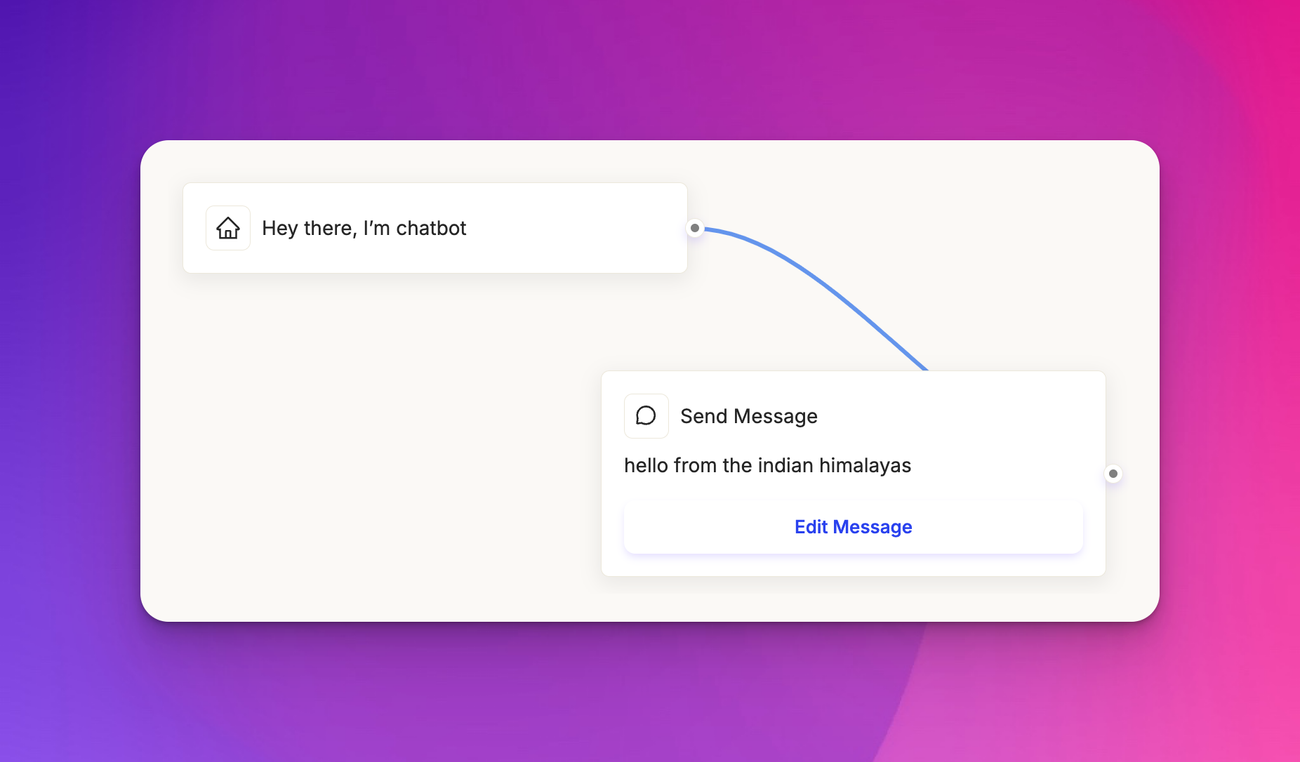
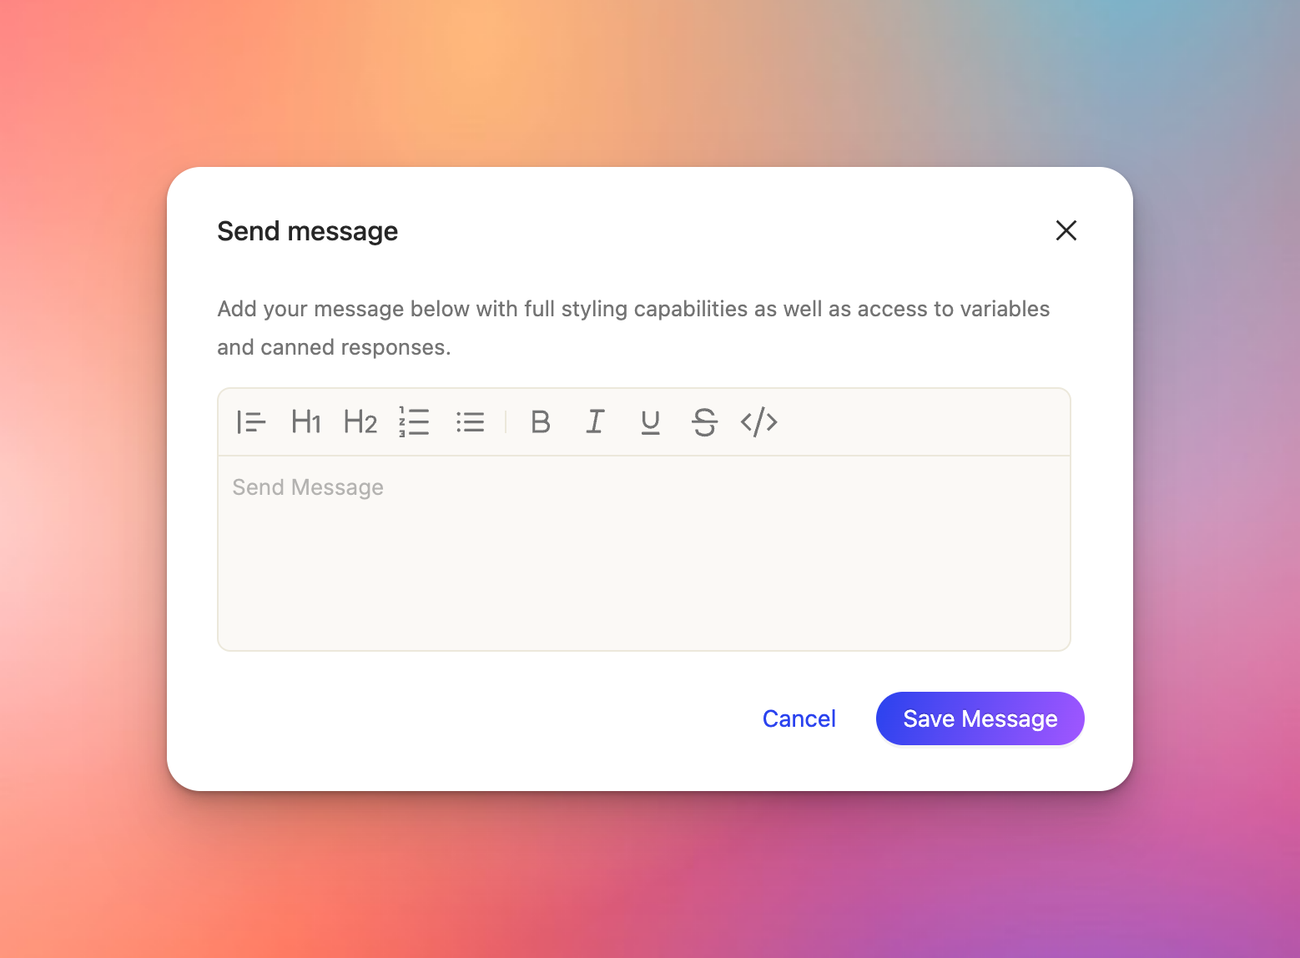
Send message
Use the ‘Send message’ block to send a message to your customer through chat. You can enter any text here that you could normally send through the ticket composer.
To add attachments, copy-paste them into the composer.
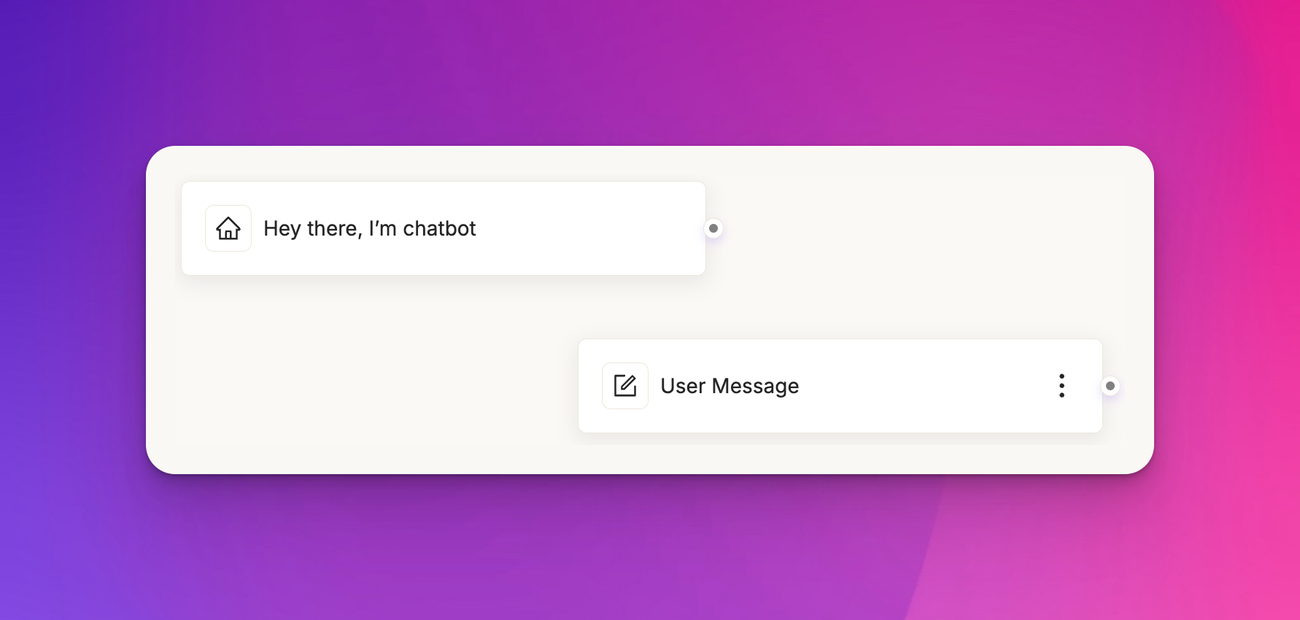
User message
Use the ‘User message‘ block to let a customer to send you a message. You can use it later in the chatbot workflow, including in manual responses from your team.
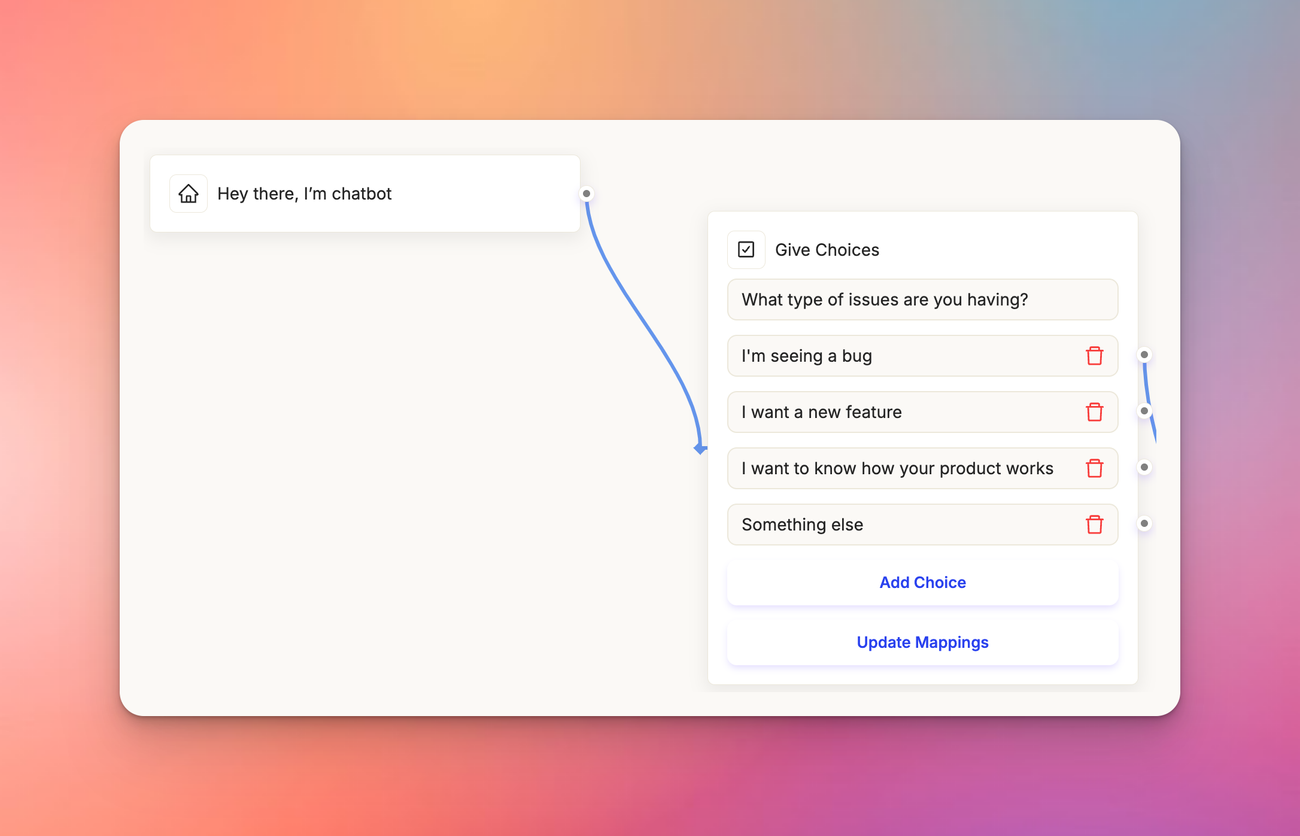
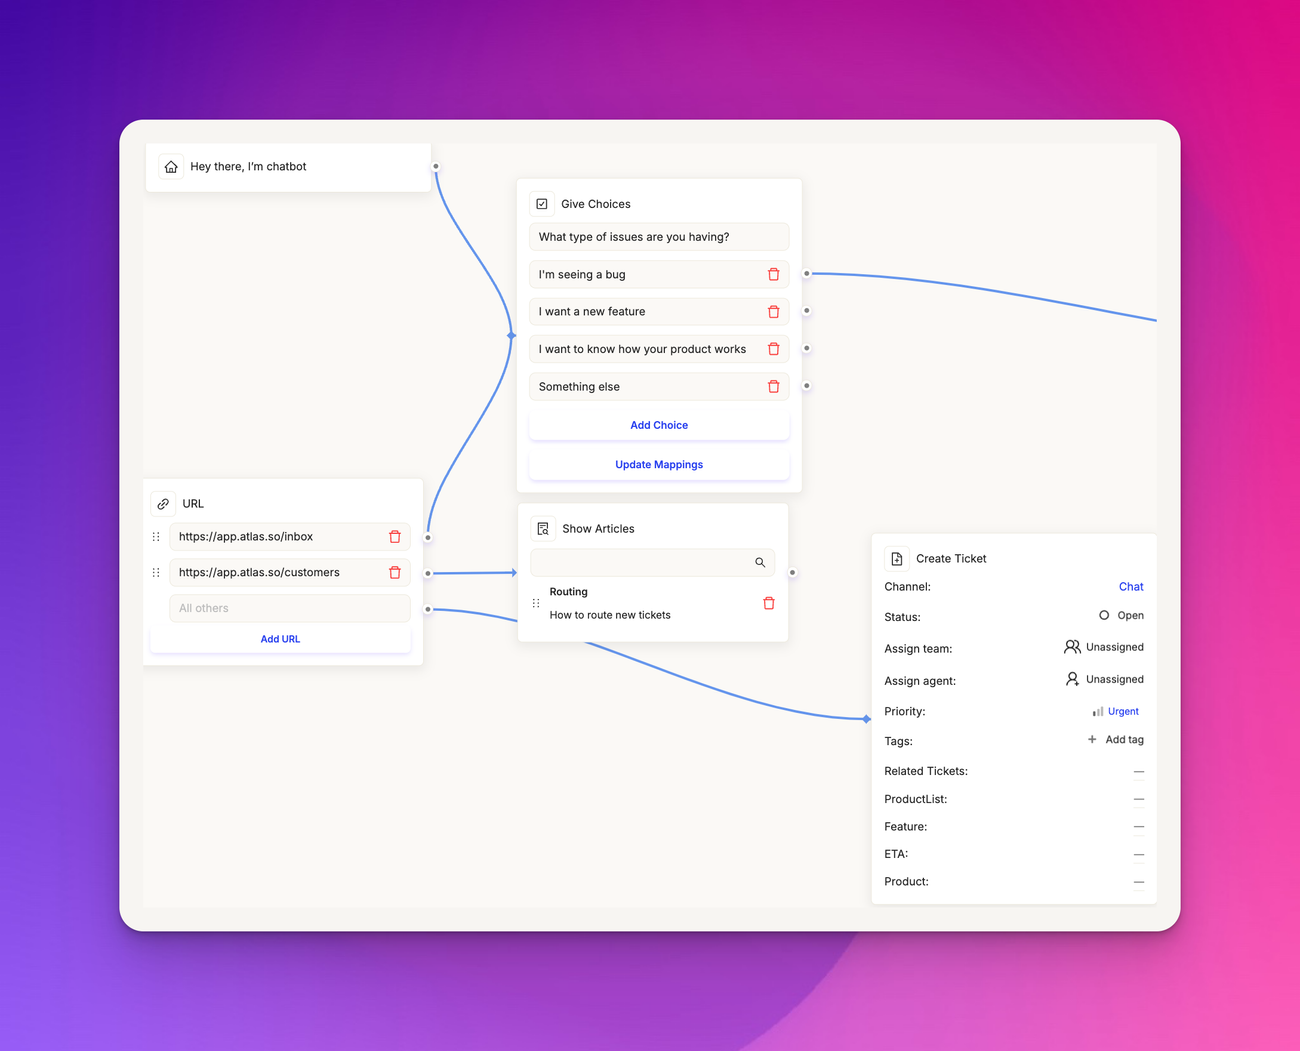
Give choices
The ‘Give choices’ block works by giving a customer a question, like "What type of issues are you having?" Based on their choice, the chatbot can take a different path.
Additionally, you can click on ‘Update mappings’ and map the customer response to different values on the ticket, customer, or account.
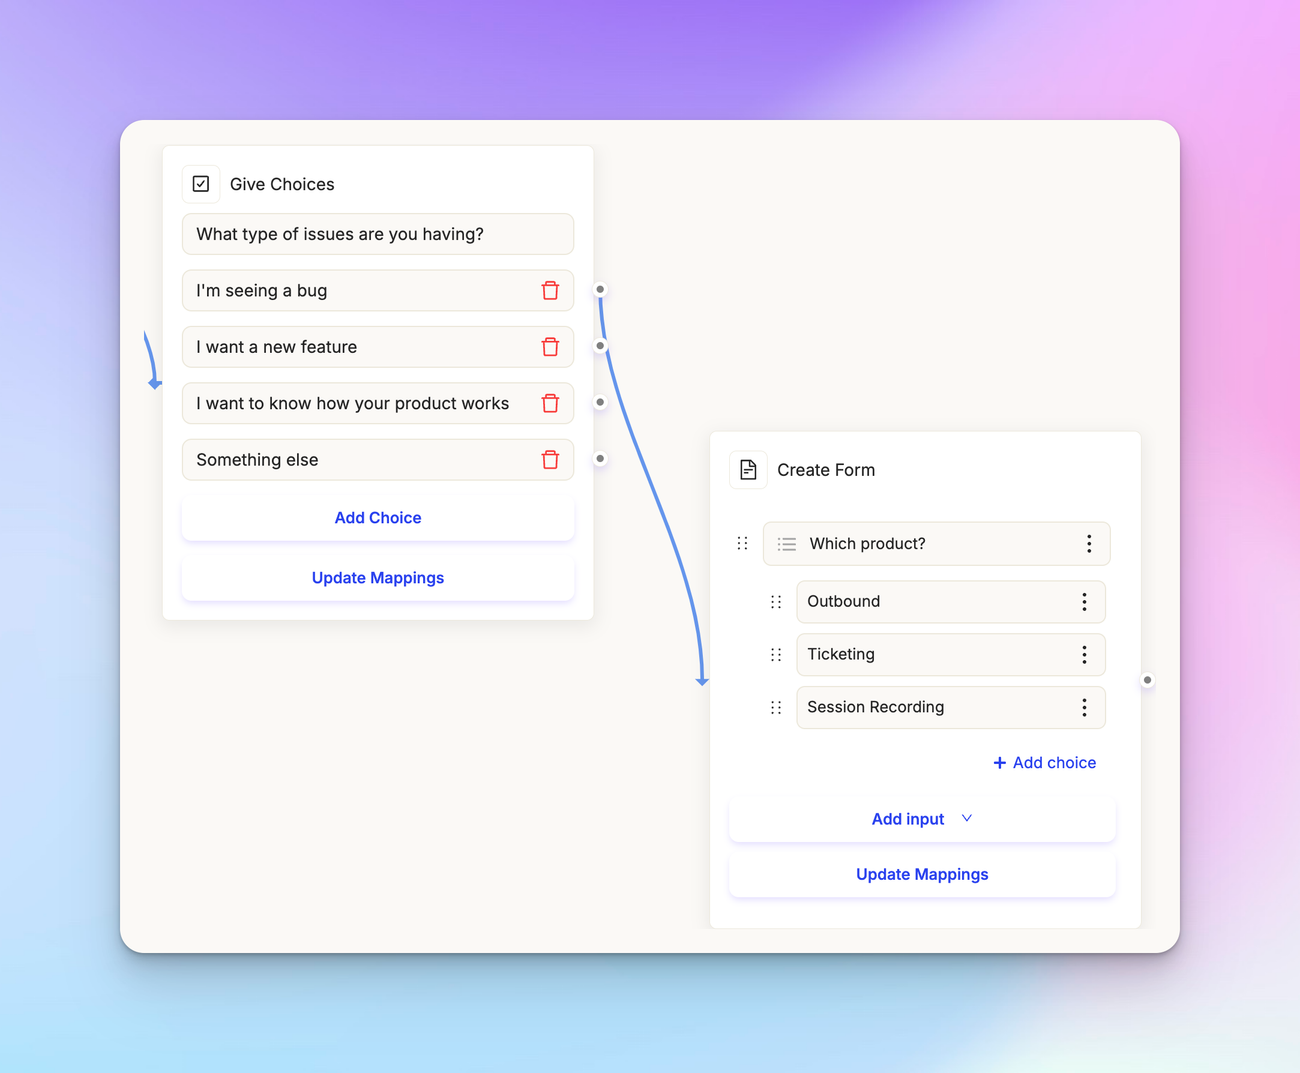
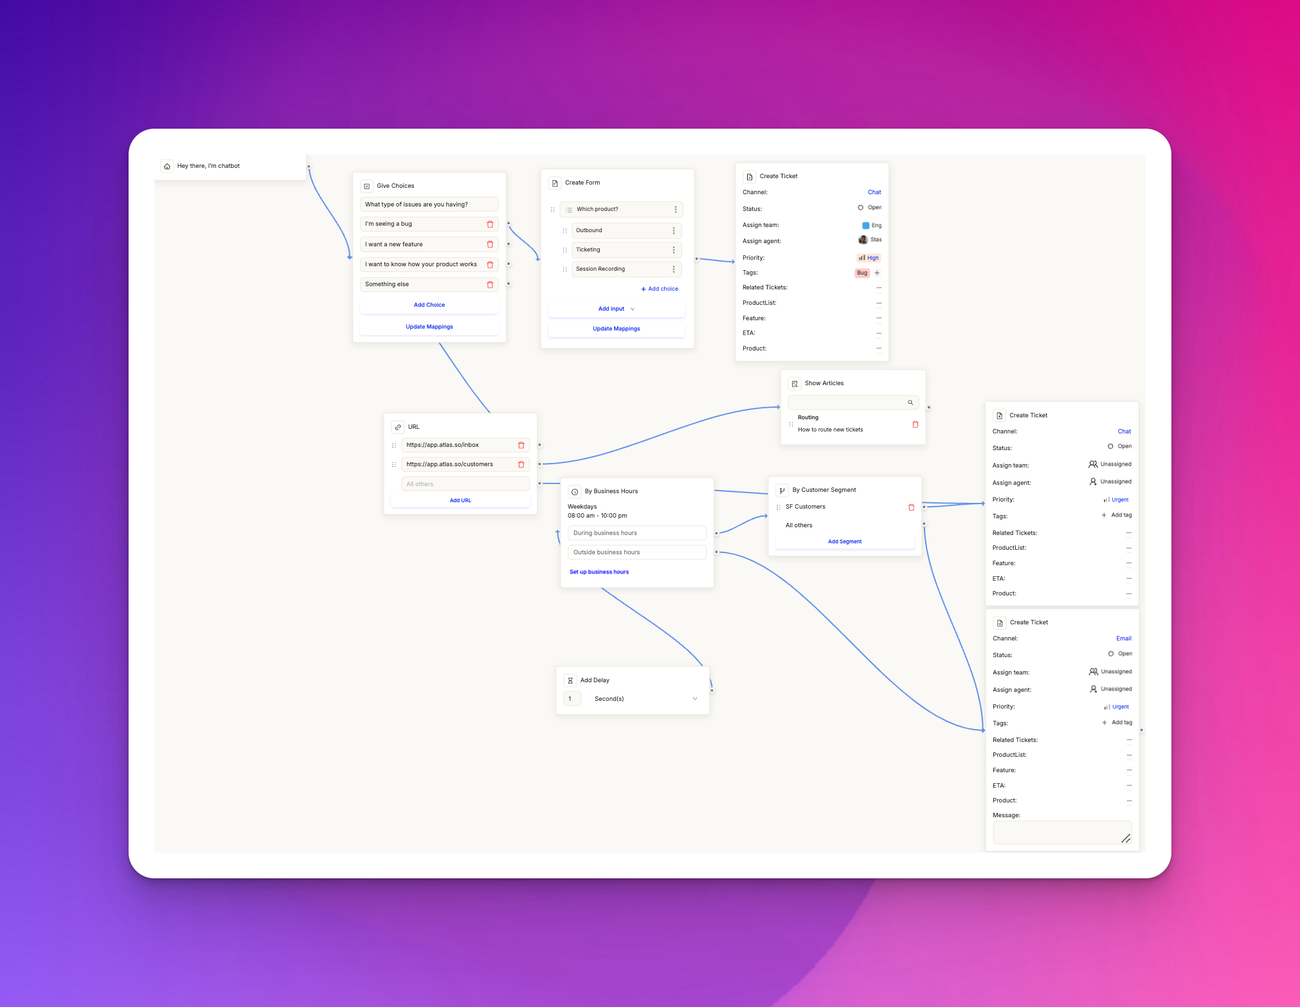
Create form
With the ‘Create form’ block, collect information from a set of customer questions. For instance, ask a customer "What type of issues are you having?" Based on their choice, the chatbot can take a different path.
To add inputs to the form, click on ‘Add input’ for custom fields on the ticket. For example, you can add a date field and ask “When did you see this bug?”
Similar to the ‘Give choices’ block, you can click on ‘Update mappings’ and map the customer response to different values on the ticket, customer, or account.
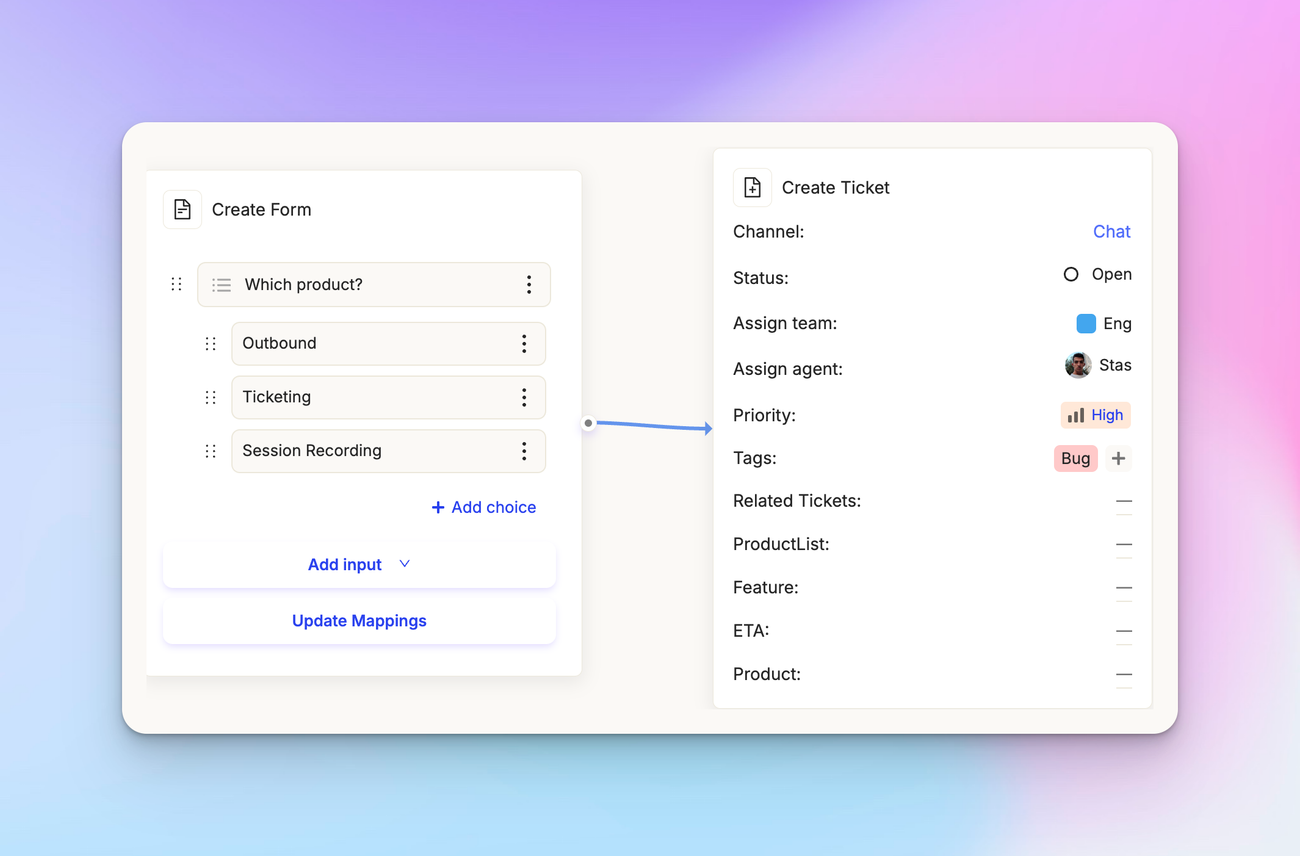
Create ticket
The ‘Create ticket’ block is a terminal block. This will end the chatbot workflow. You can specify the channel, set the status, assign the ticket to a specific teammate, set the priority, and tag it. You can also set any custom property that you have on tickets or custom field that you've created.
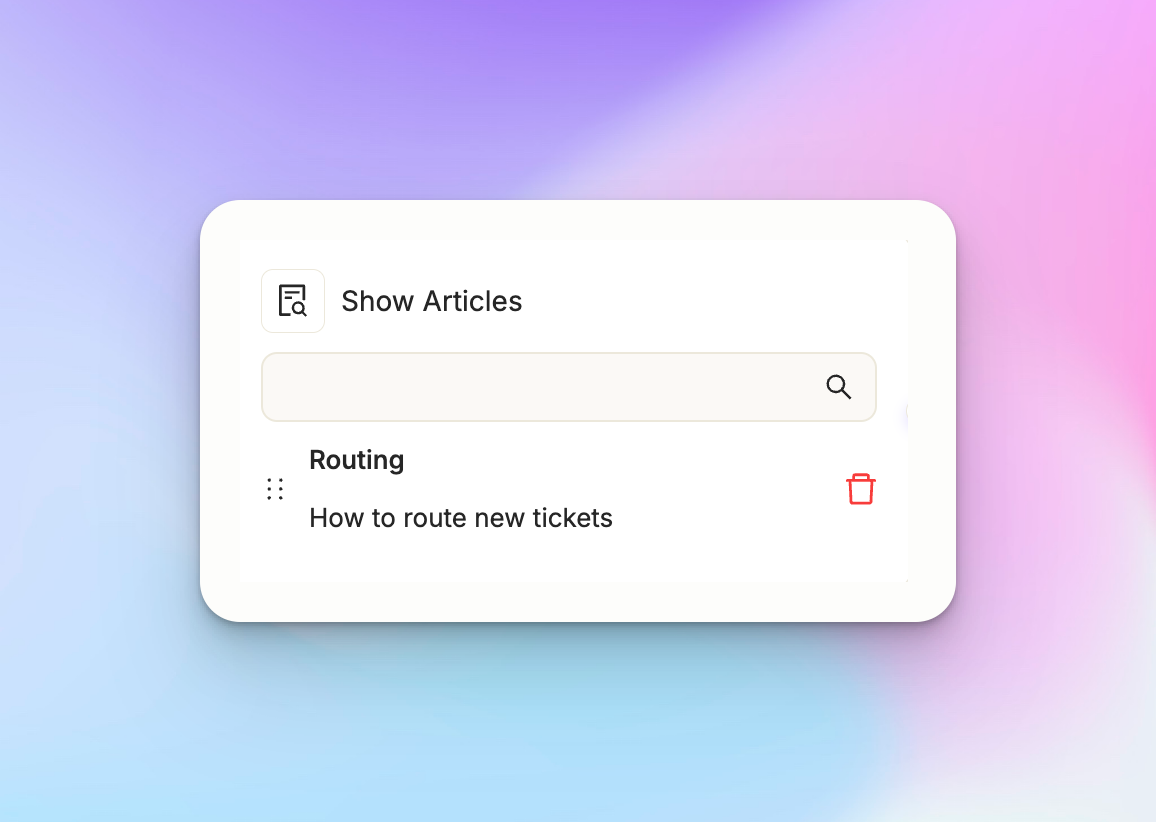
Show articles
Give your customers targeted help by showing them articles relevant to their query with the ‘Show articles’ block. Choose which articles to show. Customers will see these as options in the chat, and can read them there or in the help center.
Branching
You can branch based on different conditions:
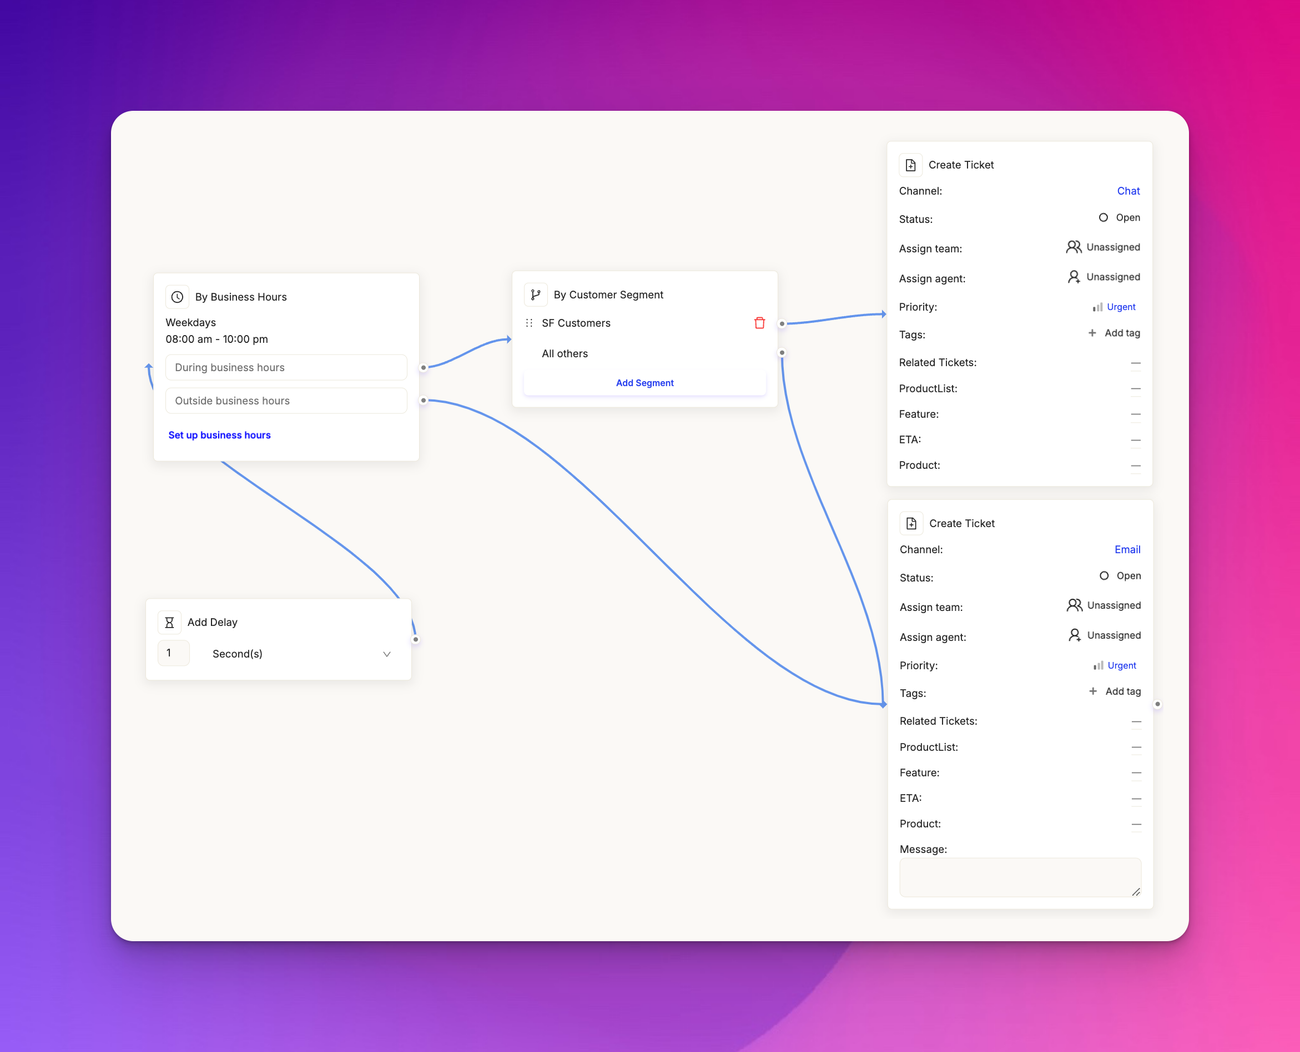
By business hours
Add different responses during and after work hours. Set it up so customers chat with agents during the day and get email support at night. Adjust your business hours right in this block.
By customer segment
For example, you might want VIP customers to go straight to chat, while others go through email.
Delay
Sometimes you'll want to have someone spend some amount of time in a delayed scenario. This is useful if you need to get data. This delay can be set from seconds to minutes, hours, or days.
By URL
Change things up based on where your customer is on your site. If they're in the inbox, show them inbox-related help articles. Just don't forget to set a catch-all for any pages you haven't specified.
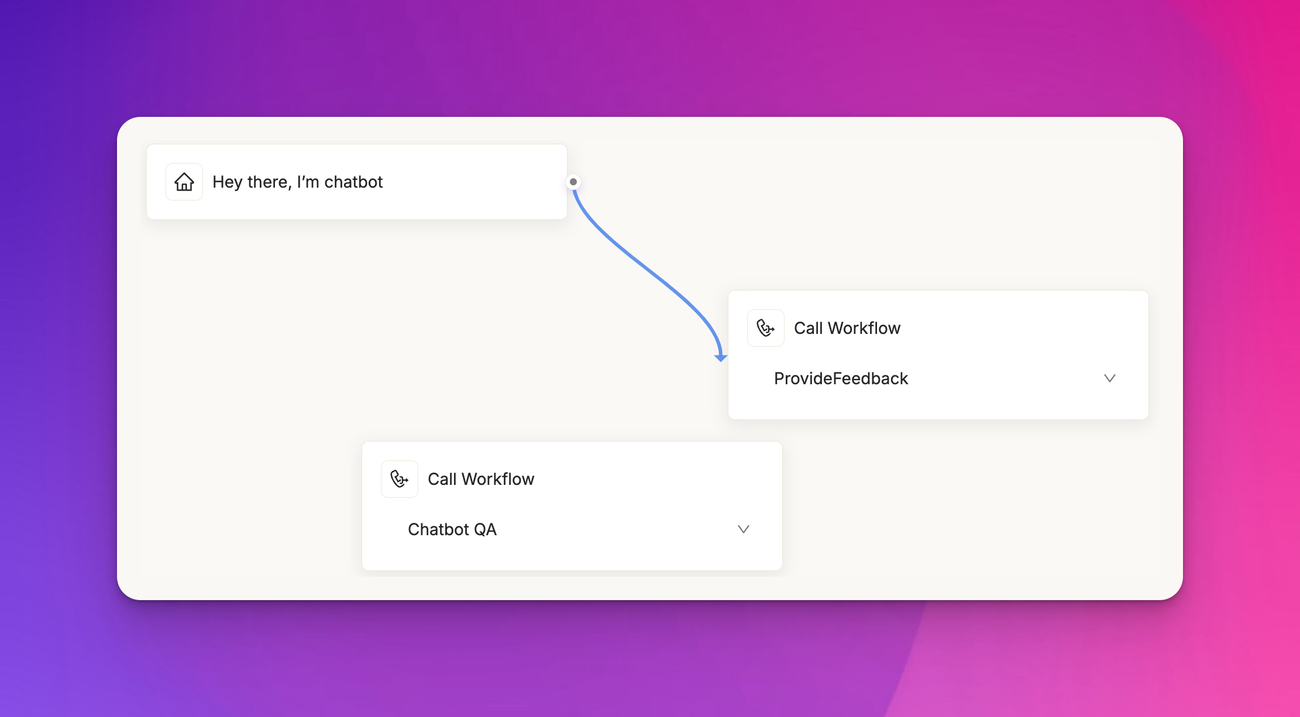
Call workflow
This entire thing we've created is called a chatbot workflow.
You can skip building this enormous workflow if you set up your chatbot via SDK.
Simply drag ‘Call workflow’ and select your workflow. You can call multiple workflows this way
With the tactics in place, here are the best practices for setting up chatbots (in our experience).
Best practices for chatbot setup
Start lean
Don't over-engineer. Launch with core functionality and iterate based on real user data. Your first version doesn't need to be perfect.
Know your use case
Be clear about what problem your chatbot is solving. Is it for support, lead gen, or something else? Focus on that primary function.
Design for conversation flow
Think about how real conversations work. Your bot should guide users naturally through interactions, not just respond to keywords.
Integrate with your stack
Make sure your chatbot plays nice with your existing tools. It should feed data into your CRM, ticketing system, or whatever else you're using.
Plan for handoffs
At some point, users will need to talk to a human. Make this transition smooth. Your bot should know when to escalate and how to pass context.
Use data to improve
Set up analytics from day one. Track completion rates, common drop-off points, and frequently asked questions. Use this to continually refine your bot.
Keep it on brand
Your chatbot is an extension of your product. Its tone and personality should align with your overall brand voice.
Respect user time
Be concise. Users come to chatbots for quick answers. If a process is complex, consider if chat is really the best medium for it.