Sending emails from Atlas
Last updated March 11, 2025
To send emails from Atlas via your support email address, you need to configure your DNS records appropriately. If your DNS records are not configured, your from address will be set to your Atlas inbox address.
Adding a sender
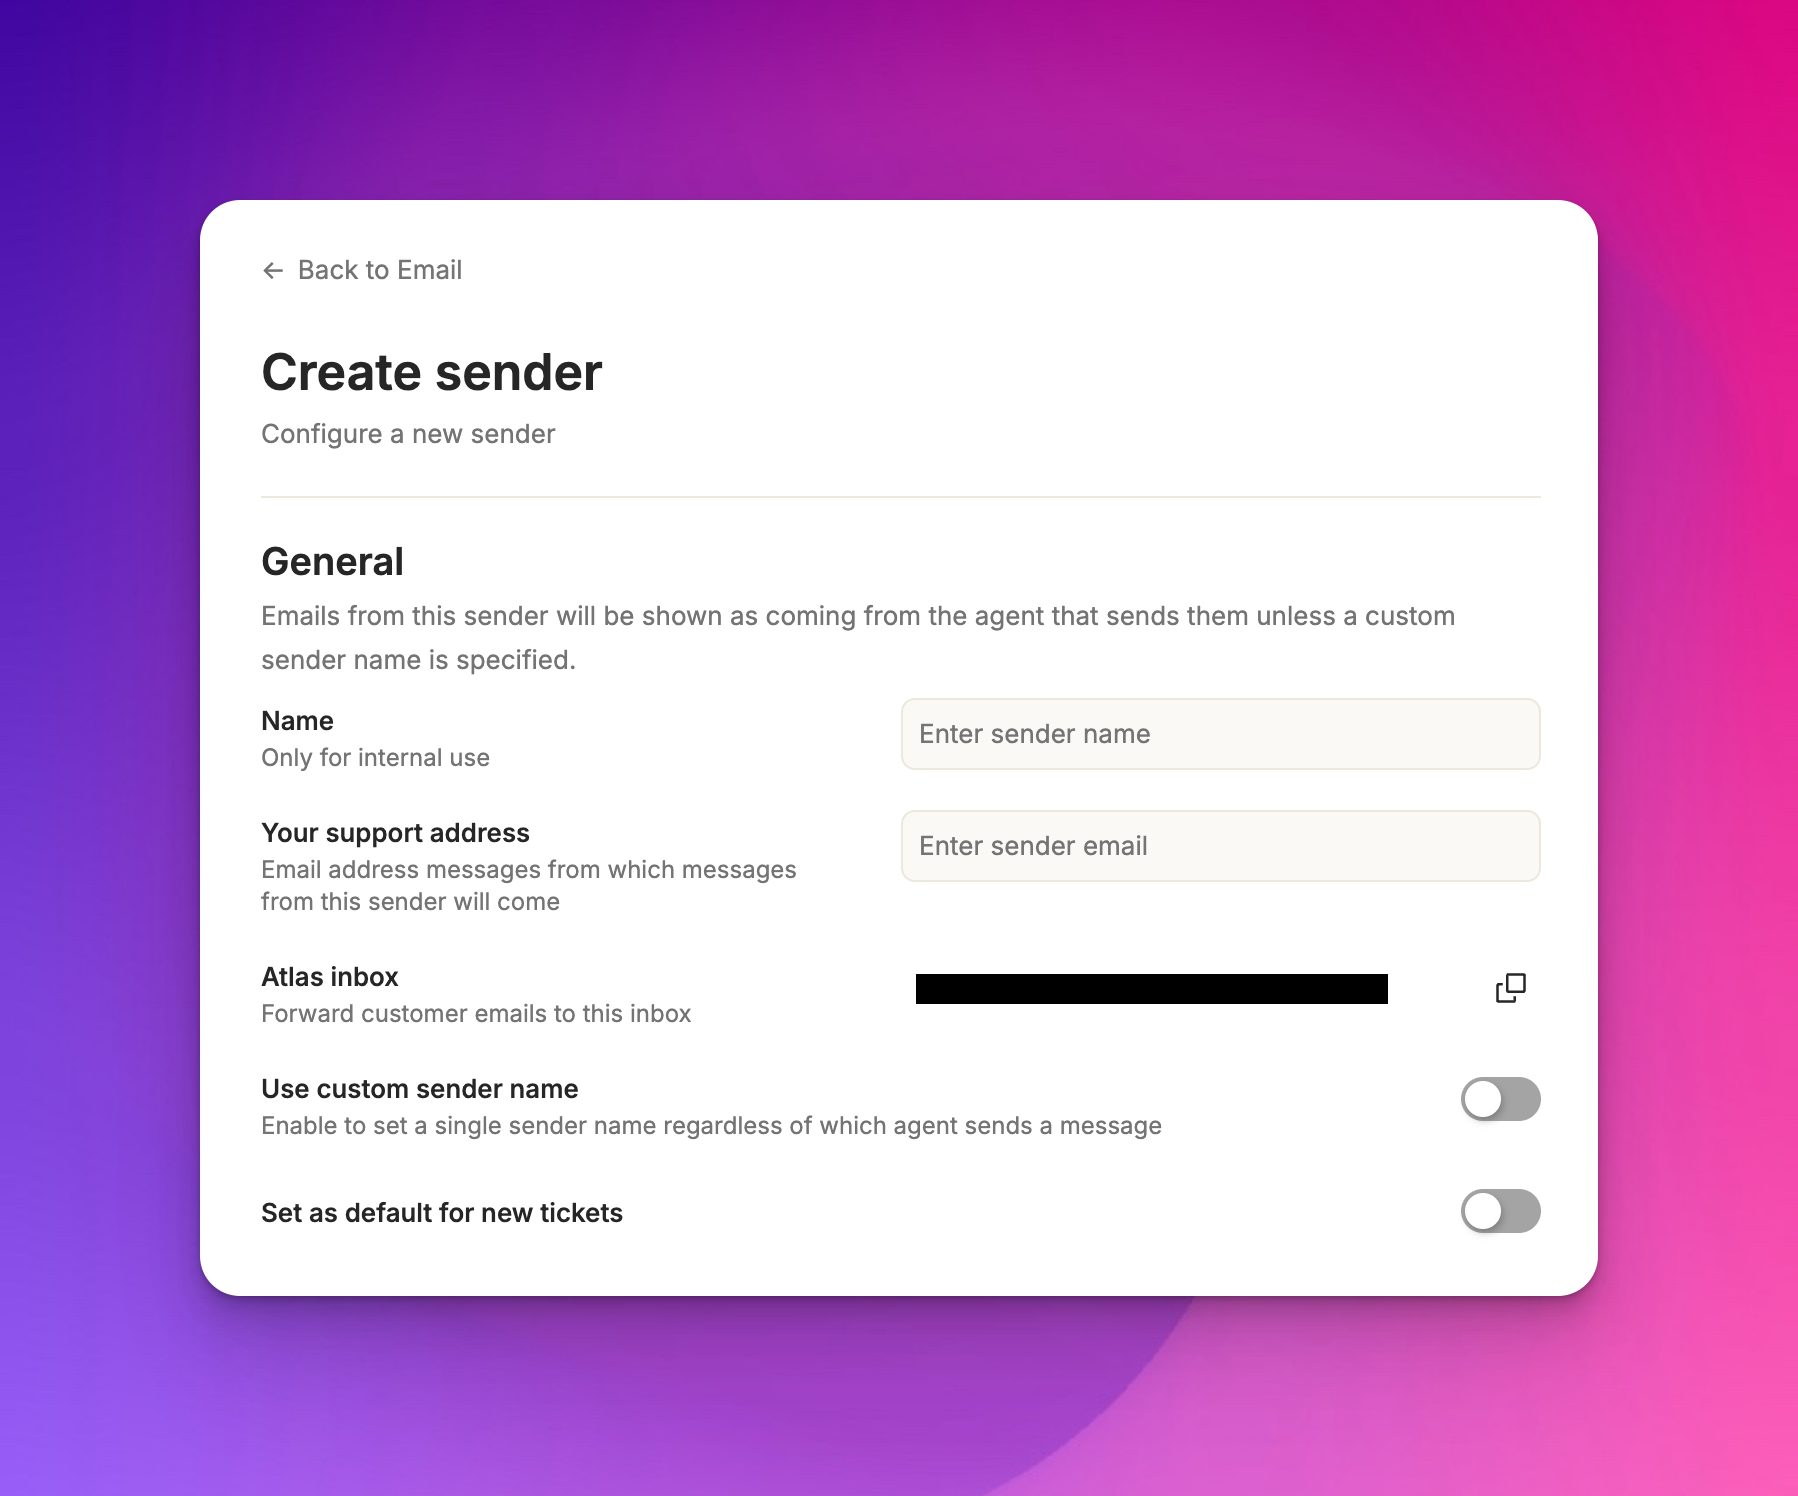
Click on Add sender to begin setup.

- Enter a name for internal reference (e.g., "Support").
- Input your support email address (typically support@yourdomain.com ).
- Note the Atlas inbox address. You'll forward all mail from your support inbox to this address.
Auto-detect sender
When a customer email is forwarded to your support inbox, Atlas automatically detects the original sender and sets them as the customer. This prevents misrouted tickets and ensures the right person is assigned every time.
How it works:
- If an internal team member forwards a customer email to Atlas, the system auto-recognizes the original sender as the customer.
- You’ll see an activity note in the ticket confirming that the customer was auto-switched.
- The forwarding team member will be CC’d automatically, so they stay in the loop.
Configuring your DNS records
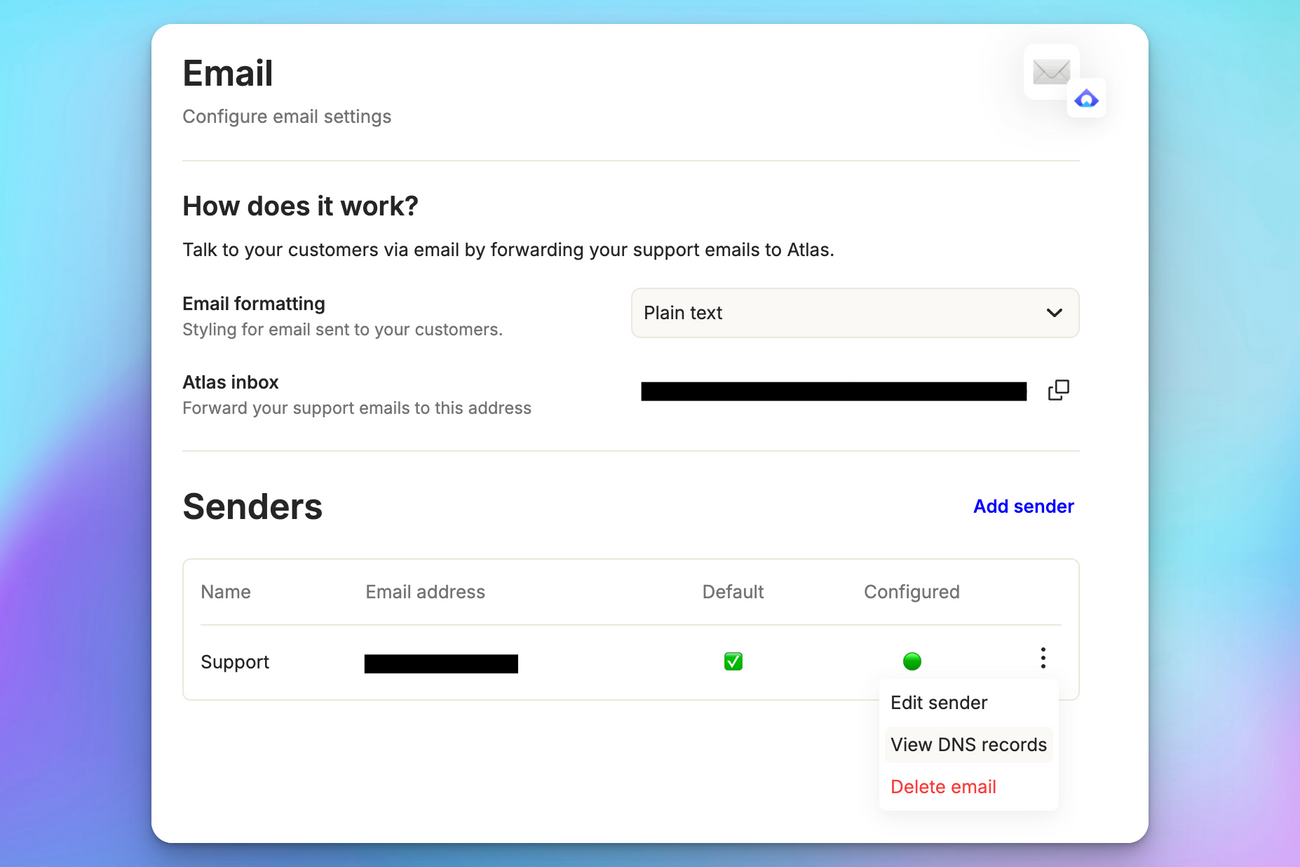
To configure your DNS records, go to the App Config > Channels > Email page and click on "View DNS Records"
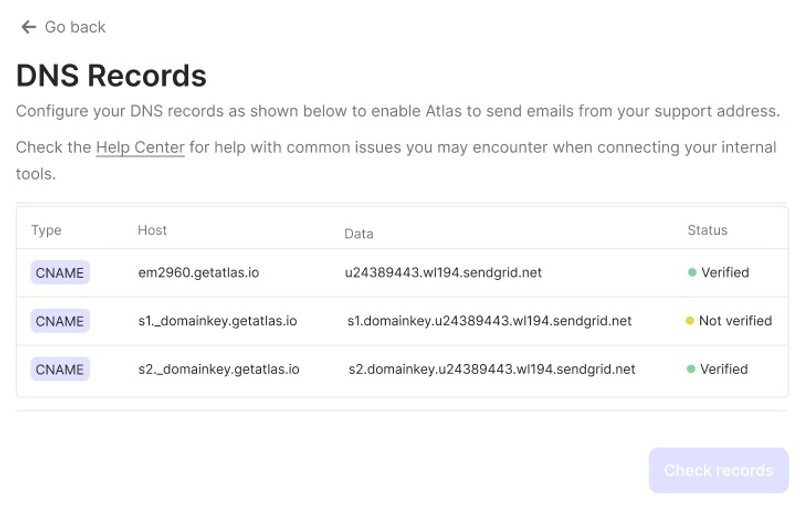
From here, you'll see a table with the DNS records you need to create for your domain that looks something like the following:

The instructions will vary slightly depending on your domain registrar (details below), but the process is generally:
- go to your domain registrar and then open their DNS
- add a new record for each of the rows in the table with the settings specified (eg, Type →
CNAME, Host →em2960.getatlas.io, etc.) - save the changes
You can check that your records are configured correctly by clicking the "Check records" button to confirm your settings. However, note that these settings can take up to 24 hours to take effect depending on your registrar's settings.
For some common registrars, see specific instructions below:


