
Last updated November 14, 2024
How does email work?
Talk to your customers via email by forwarding your support emails to your designated Atlas inbox. Reply to customers from your own address by configuring your DNS records to send emails from your support email address.
Receiving email in Atlas
To receive emails in Atlas, setup forwarding in your support inbox to forward new emails to your Atlas inbox.
If you have a designated support email address:
If you're using Google Workspace, you can find instructions here . If you're using Outlook, you can find instructions here .
If you are using Google Groups:
Add your Atlas inbox as a member of the group that can both post to the group and view conversations sent to the group.
If you are forwarding emails from a Google workspace:
Add a routing rule and set your Atlas inbox as one of the recipients in the routing rule. If you would like the messages to continue to go to your team, make sure you also include your teammates as recipients.
If your emails don't show up in Atlas after your forwarding rules are turned on, check that your company allows forwarding to an external domain. If it doesn't you should add your Atlas inbox to the allowlist for external forwarding.
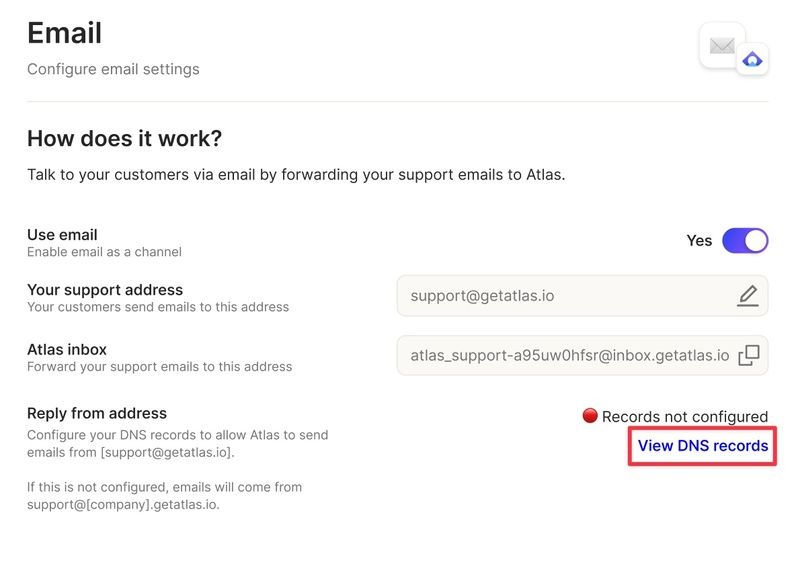
Sending mail via your email address
To send emails from Atlas via your support email address, you need to configure your DNS records appropriately. If your DNS records are not configured, your from address will be set to your Atlas inbox address.
Configuring your DNS records
To configure your DNS records, go to the App Config > Channels > Email page and click on "View DNS Records"
From here, you'll see a table with the DNS records you need to create for your domain that looks something like the following:
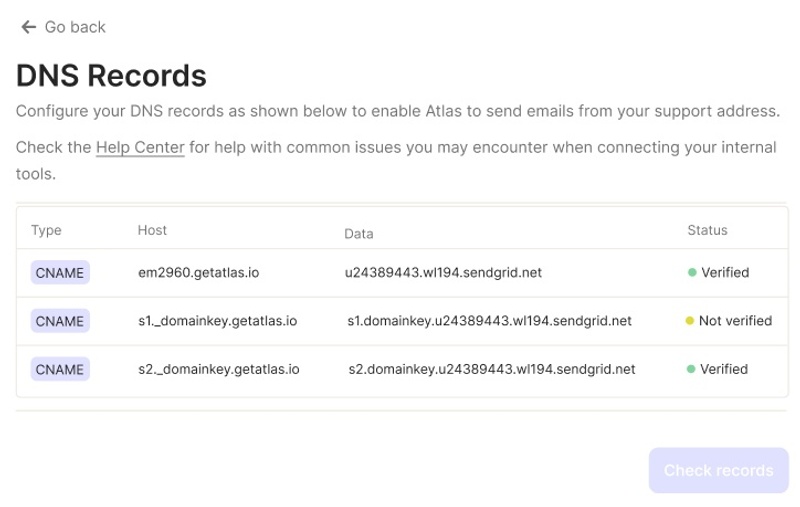
The instructions will vary slightly depending on your domain registrar (details below), but the process is generally:
- go to your domain registrar and then open their DNS
- add a new record for each of the rows in the table with the settings specified (eg, Type →
CNAME, Host →em2960.getatlas.io, etc.) - save the changes
You can check that your records are configured correctly by clicking the "Check records" button to confirm your settings. However, note that these settings can take up to 24 hours to take effect depending on your registrar's settings.
For some common registrars, see specific instructions below: