Receiving emails in Atlas
Last updated February 28, 2025
Talk to your customers via email by forwarding your support emails to your designated Atlas inbox. To receive emails in Atlas, setup forwarding in your support inbox to forward new emails to your Atlas inbox.
Forwarding from Google Workspace
If you have a designated support email address:
If you're using Google Workspace, you can find instructions here . If you're using Outlook, you can find instructions here .
If you are using Google Groups:
Add your Atlas inbox as a member of the group that can both post to the group and view conversations sent to the group.
If you are forwarding emails from a Google workspace:
Add a routing rule and set your Atlas inbox as one of the recipients in the routing rule. If you would like the messages to continue to go to your team, make sure you also include your teammates as recipients.
If your emails don't show up in Atlas after your forwarding rules are turned on, check that your company allows forwarding to an external domain. If it doesn't you should add your Atlas inbox to the allowlist for external forwarding.
Forwarding from Outlook
Before you start:
- Ensure you have Exchange administrator or Global administrator privileges in Microsoft 365.
- The source mailbox must have an active license unless it’s a shared mailbox.
- To forward emails to external recipients, verify that your organization’s policies permit automatic external forwarding.
Steps to configure email forwarding:
- Access the Microsoft 365 Admin Center:
- Navigate to https://admin.microsoft.com and sign in with your administrator credentials.
- Select the User:
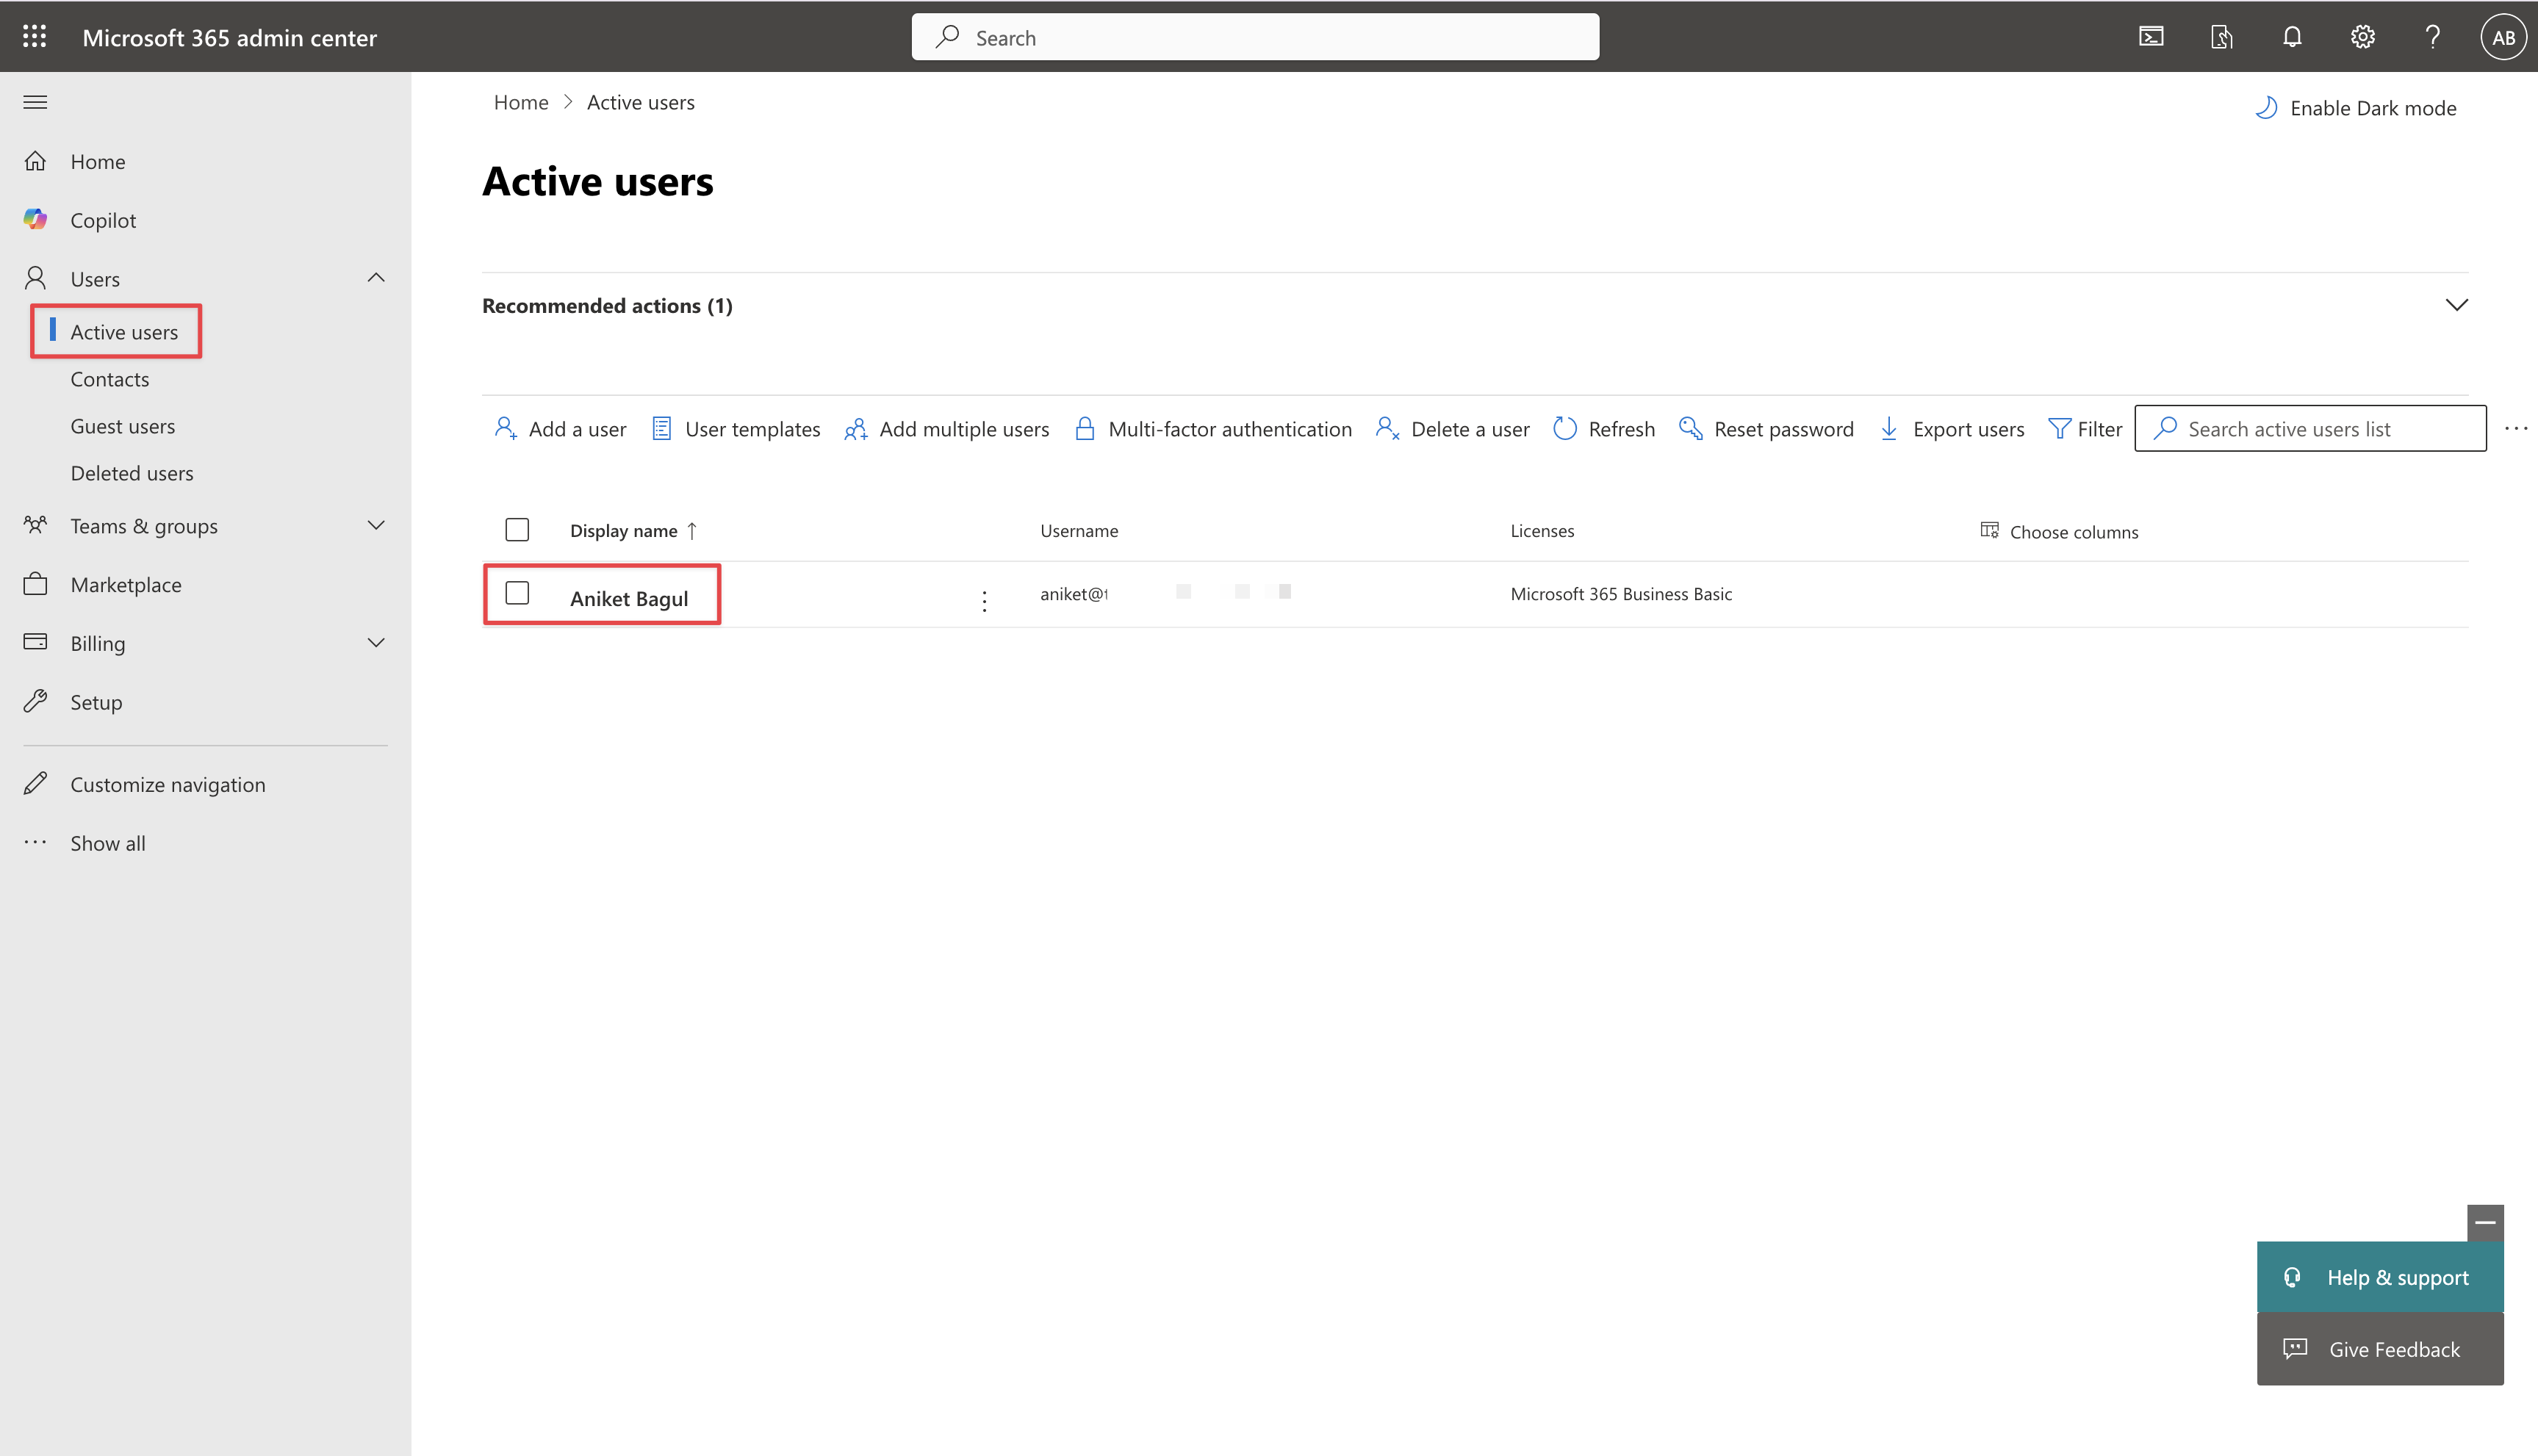
- In the left-hand navigation pane, go to Users > Active users.
- Choose the user whose email you want to forward.

- Configure Email Forwarding:
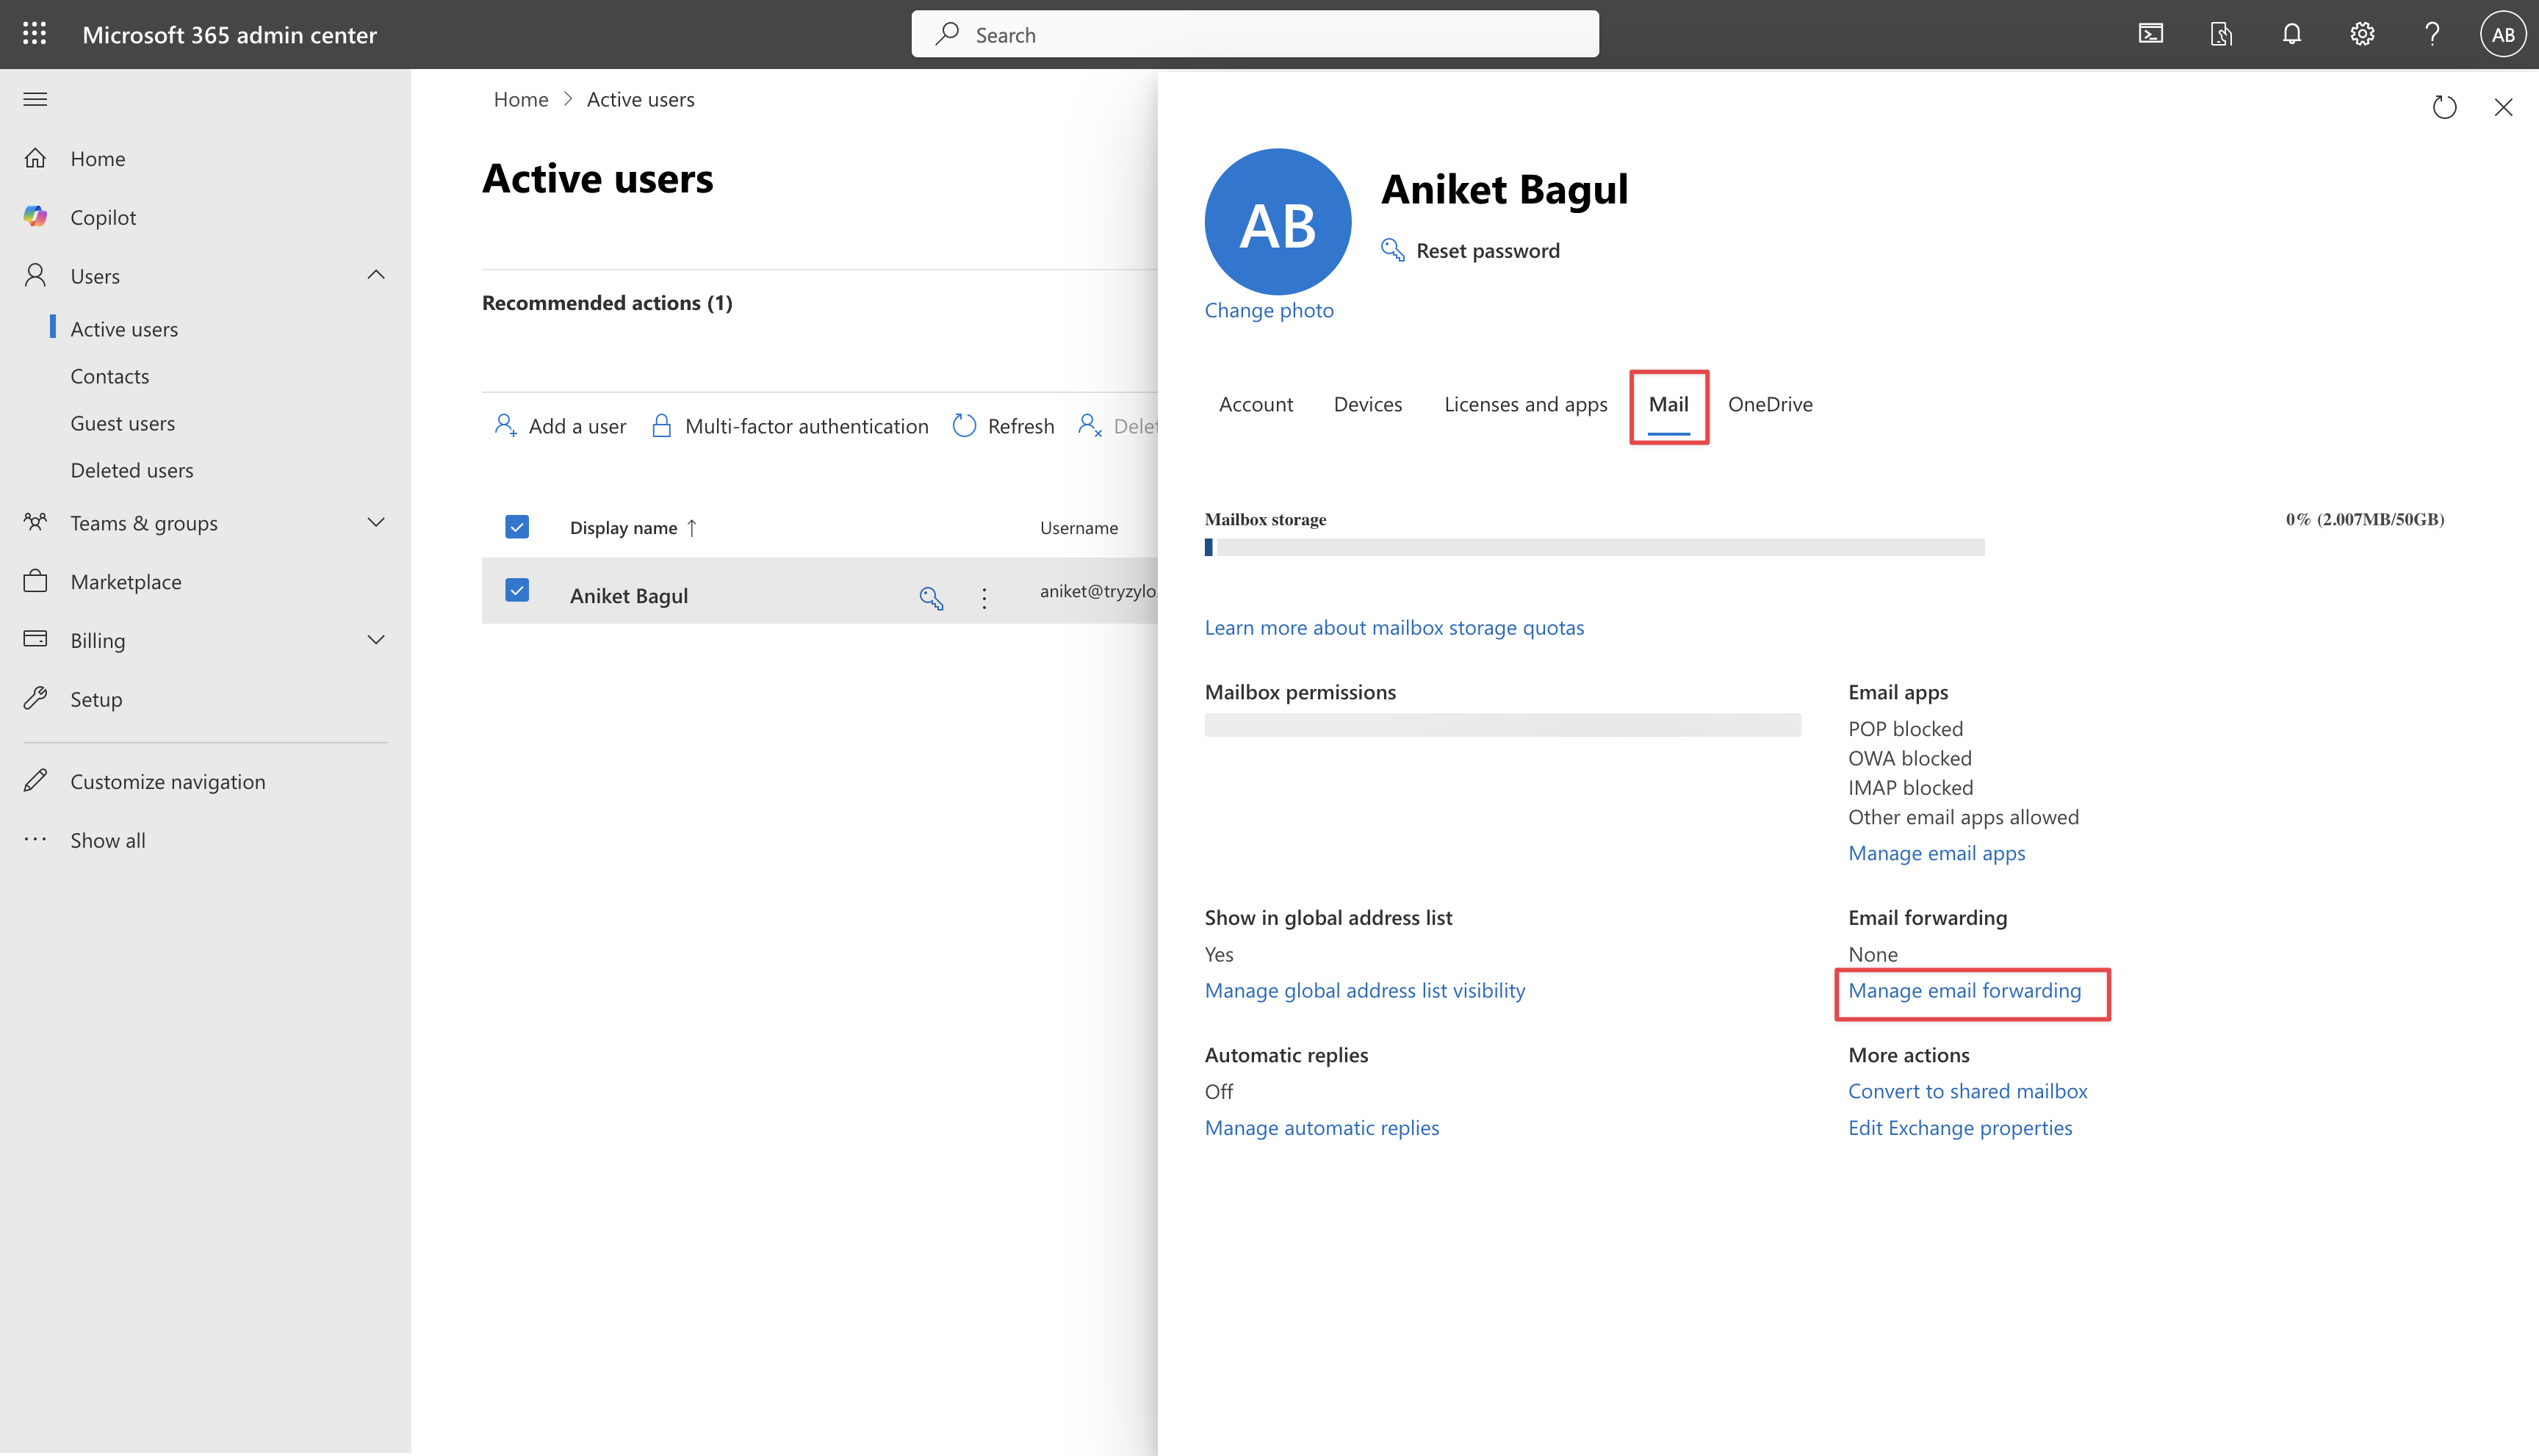
- In the user’s settings, select the Mail tab.
- Click on Manage email forwarding.
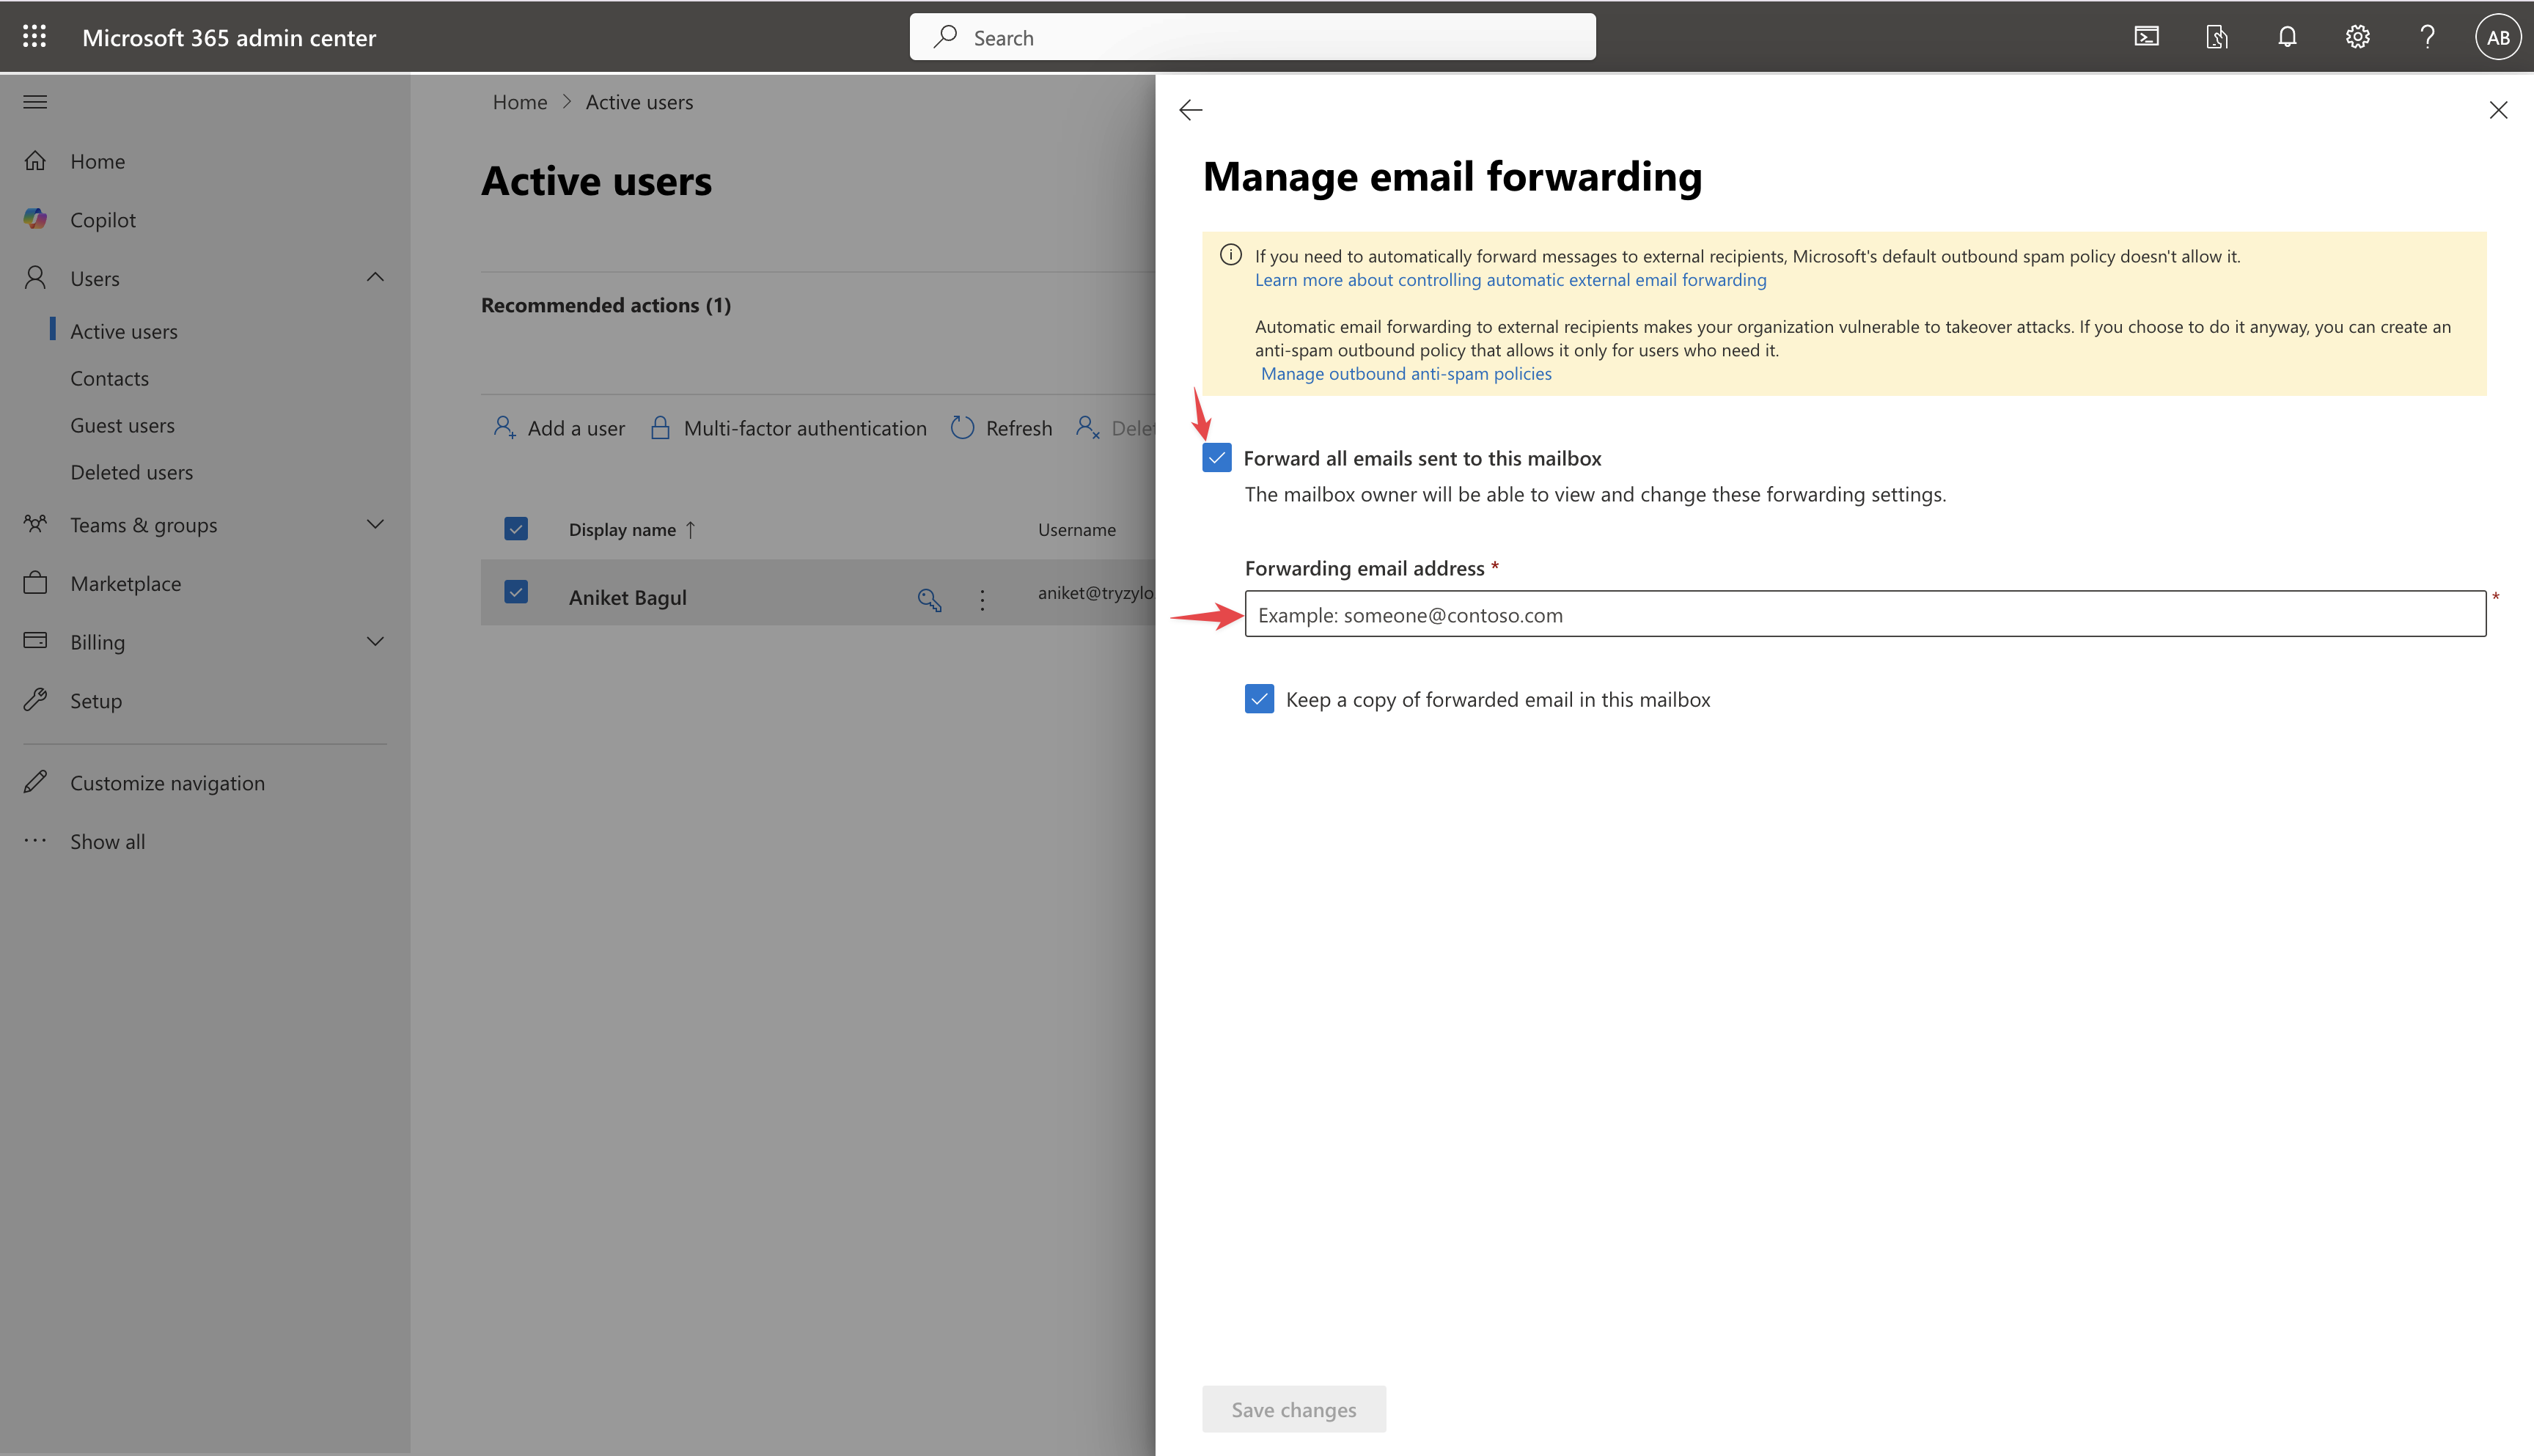
- Toggle on Forward all emails sent to this mailbox.
- Enter the forwarding email address.
- Click Save changes.


