

Setting up your team
Last updated February 4, 2025
Overview
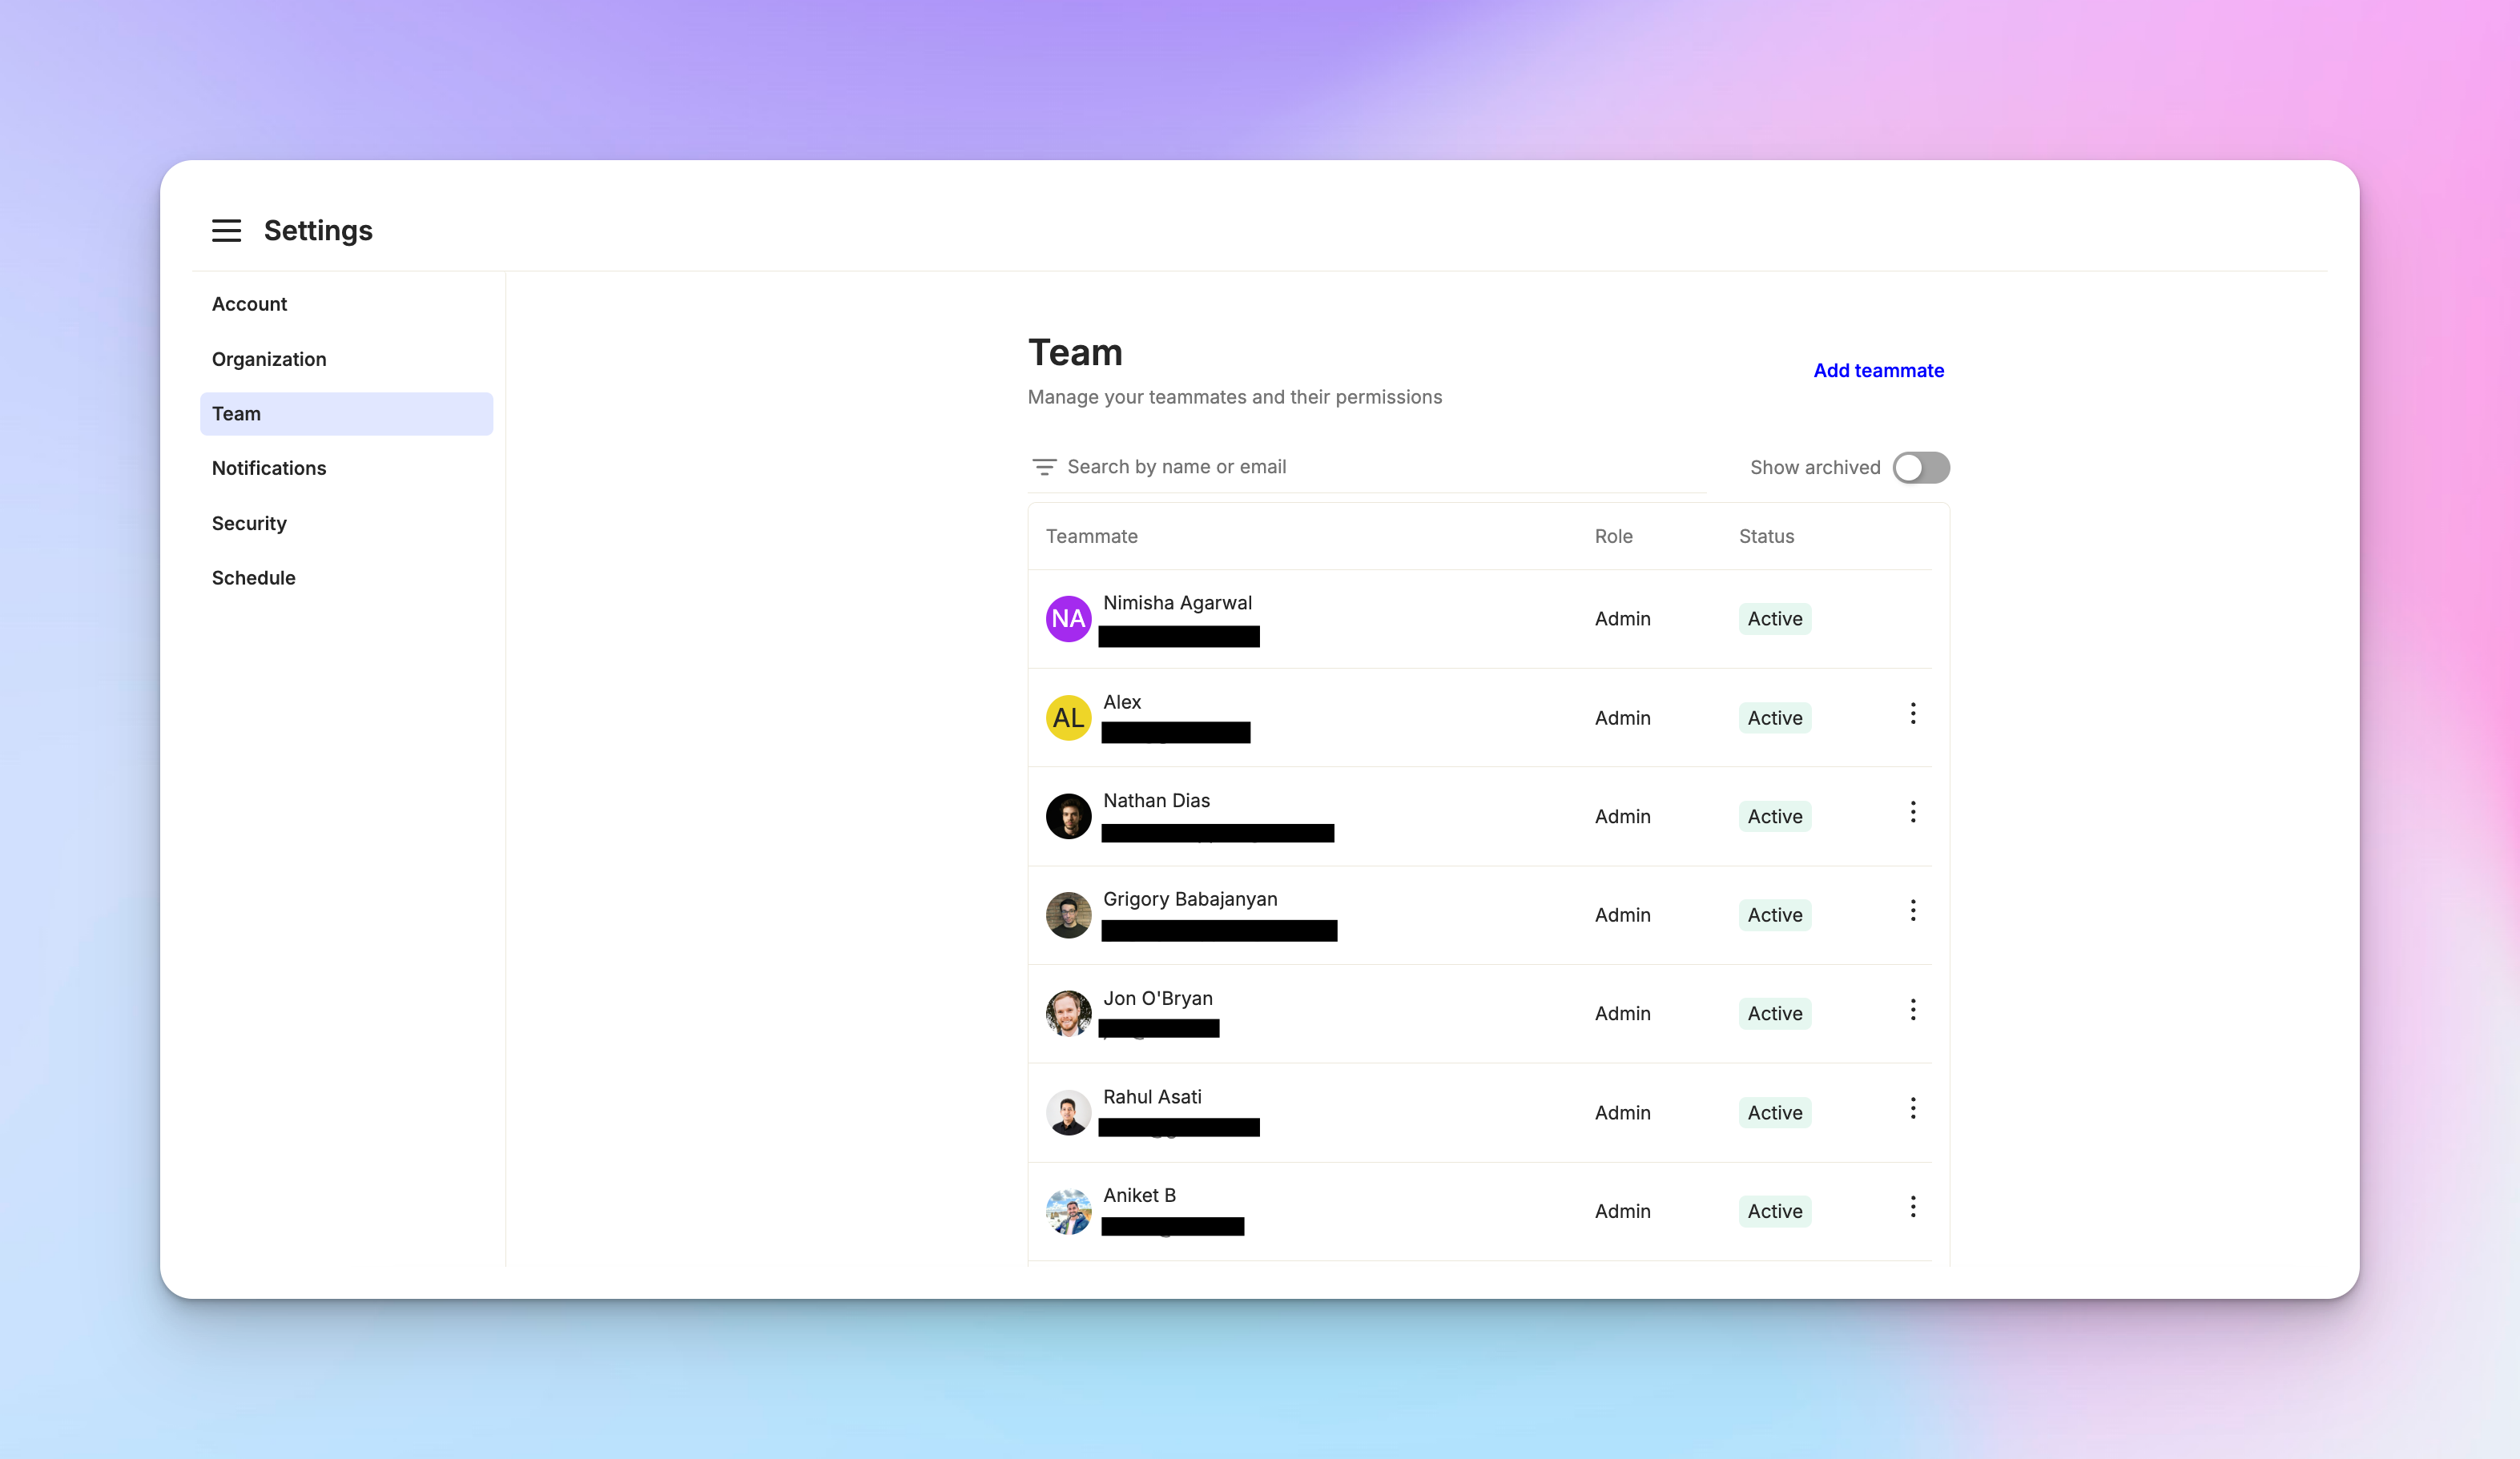
The team settings in Atlas allow you to manage your support staff, assign roles, and control access to various features. Proper team management ensures smooth operations and maintains data security.
Accessing team settings
To manage your team, go to Settings > Team. Here you'll find options to add, edit, and organize your team members.
Adding team members
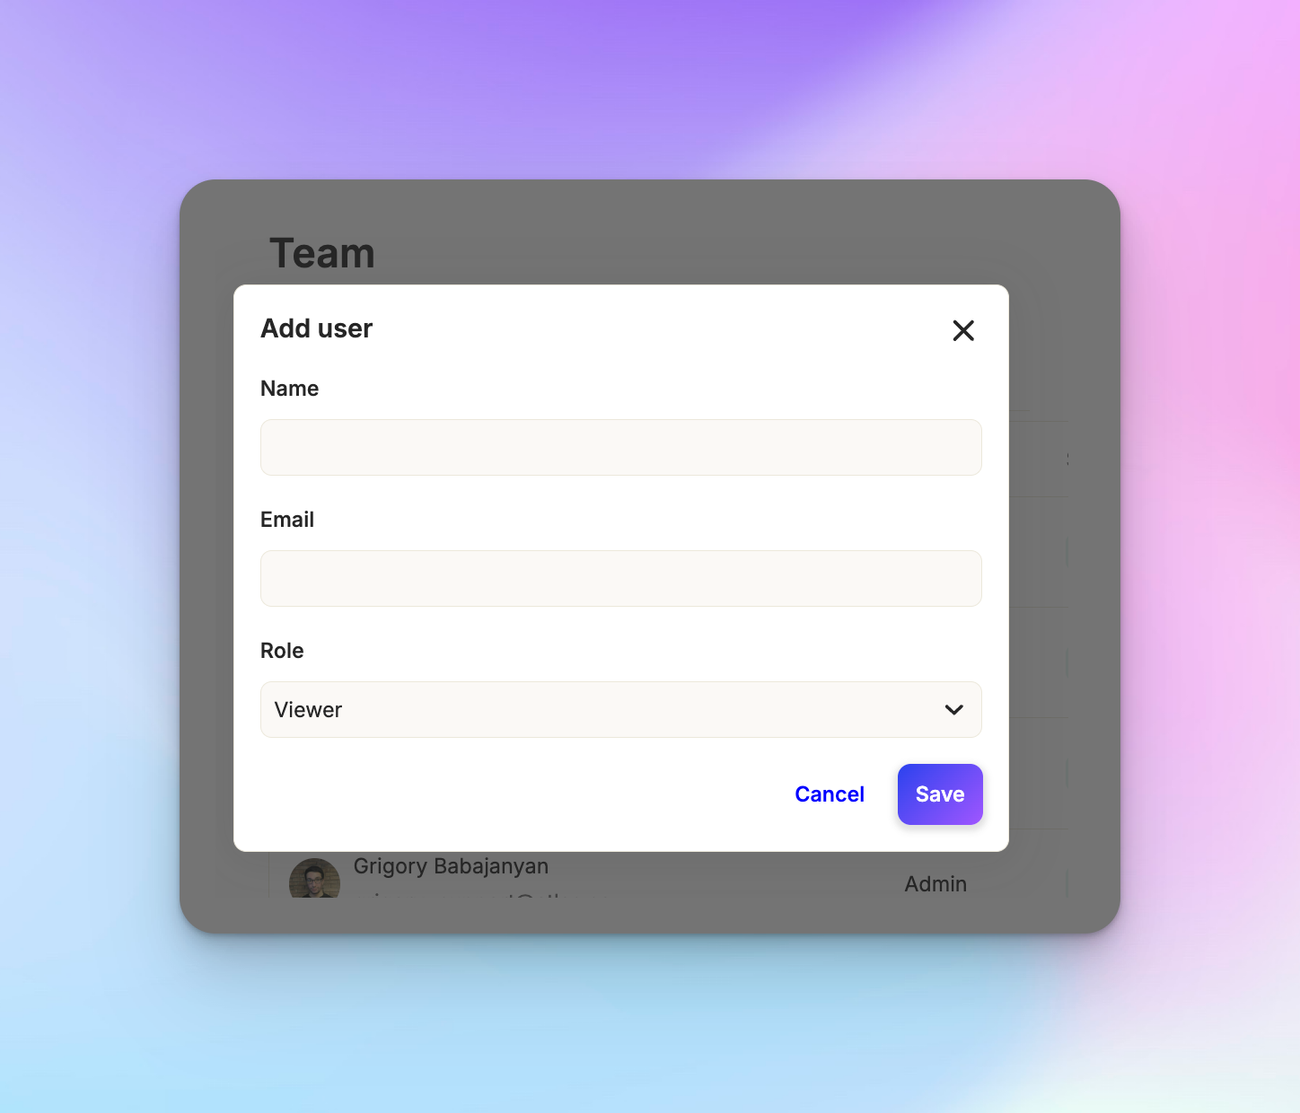
To add a new team member, click on the "Add Member" button. Enter the email address of the new member and select their role. Once added, the new member will receive an invitation email to join your Atlas workspace.
Roles and permissions
Atlas offers different roles to manage access levels:
Admin
Full access to all features and settings.
Agent
Can handle tickets and access basic features.
Editing team member information
To edit a team member's details, click on their name in the team list. You can update their name, email, role, and other relevant information.
Archiving team members
When a team member leaves your organization, you can archive their account. This preserves their history and contributions while removing their access to the system. To archive a member, click on the options menu next to their name and select "Archive".