

Atlas Setup
Last updated February 24, 2025
Overview
Here’a an overview of how to set up Atlas and get the most out of it quickly. We'll cover 7 essential steps to get you started.
Step 1: Installing the chat widget
Atlas offers multiple channels like chat, email, WhatsApp, SMS, Slack Connect, Discord, Shopify, and customer portal. Many users start with chat.
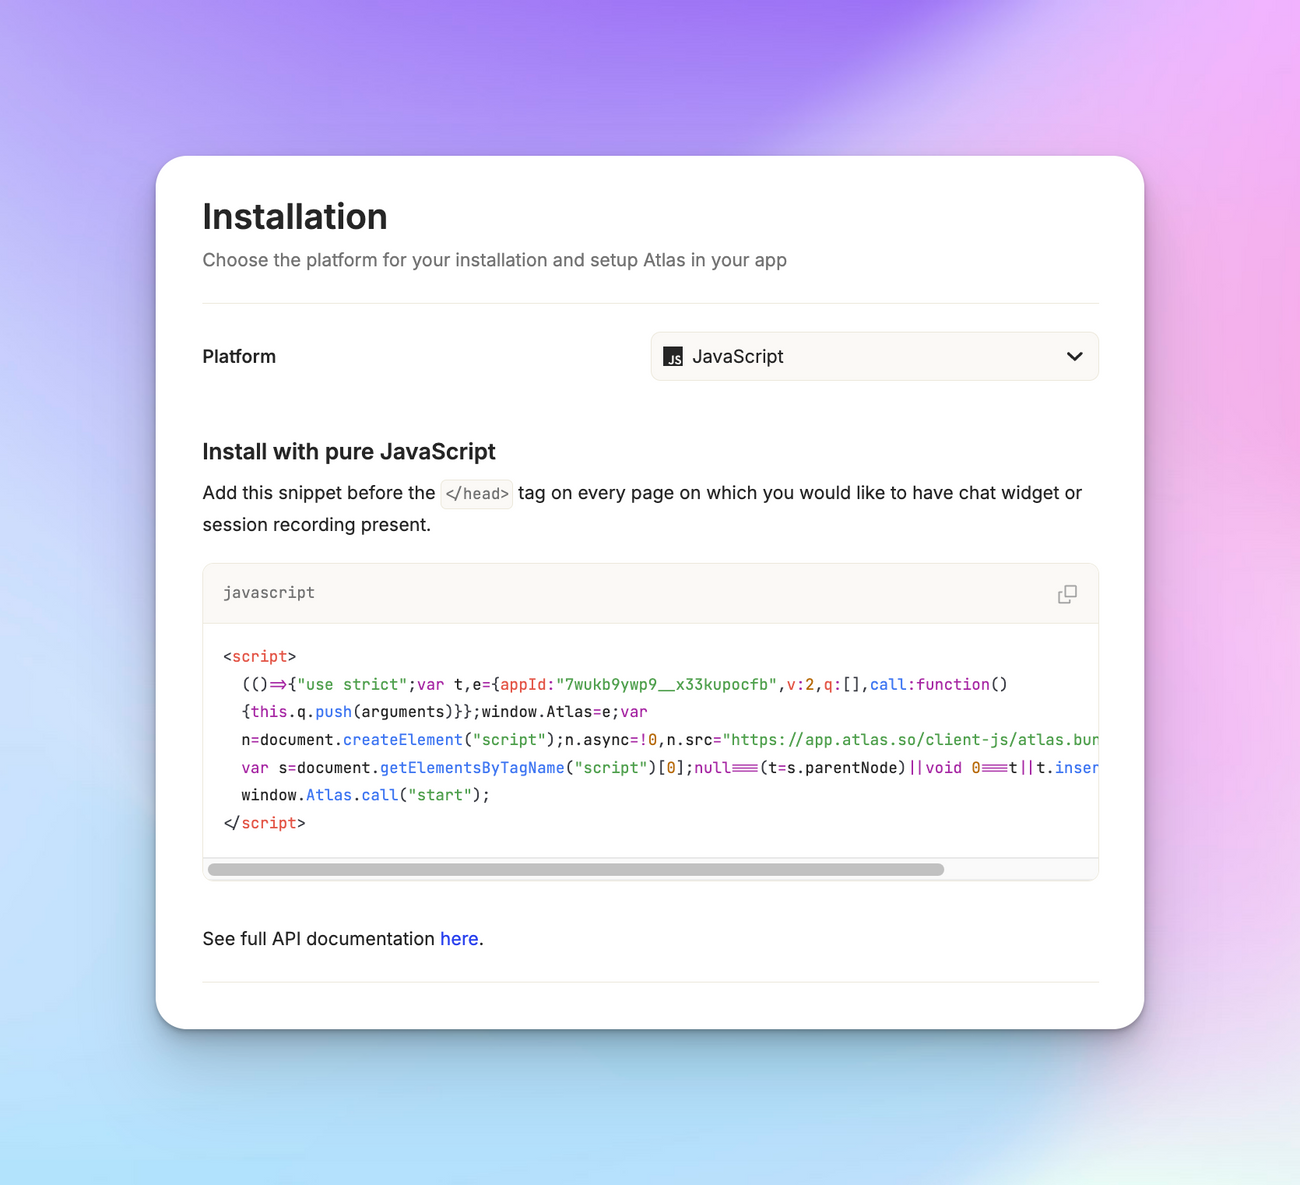
Atlas chat is a widget you can add to your application or marketing website for users to contact you. It's useful for reporting bugs, asking questions, or submitting support requests. Installation takes just a couple of minutes.
To install:
- Take the provided code snippet from “ App Configuration > Getting Started > Installation ”.
- Add it to your marketing site or application.
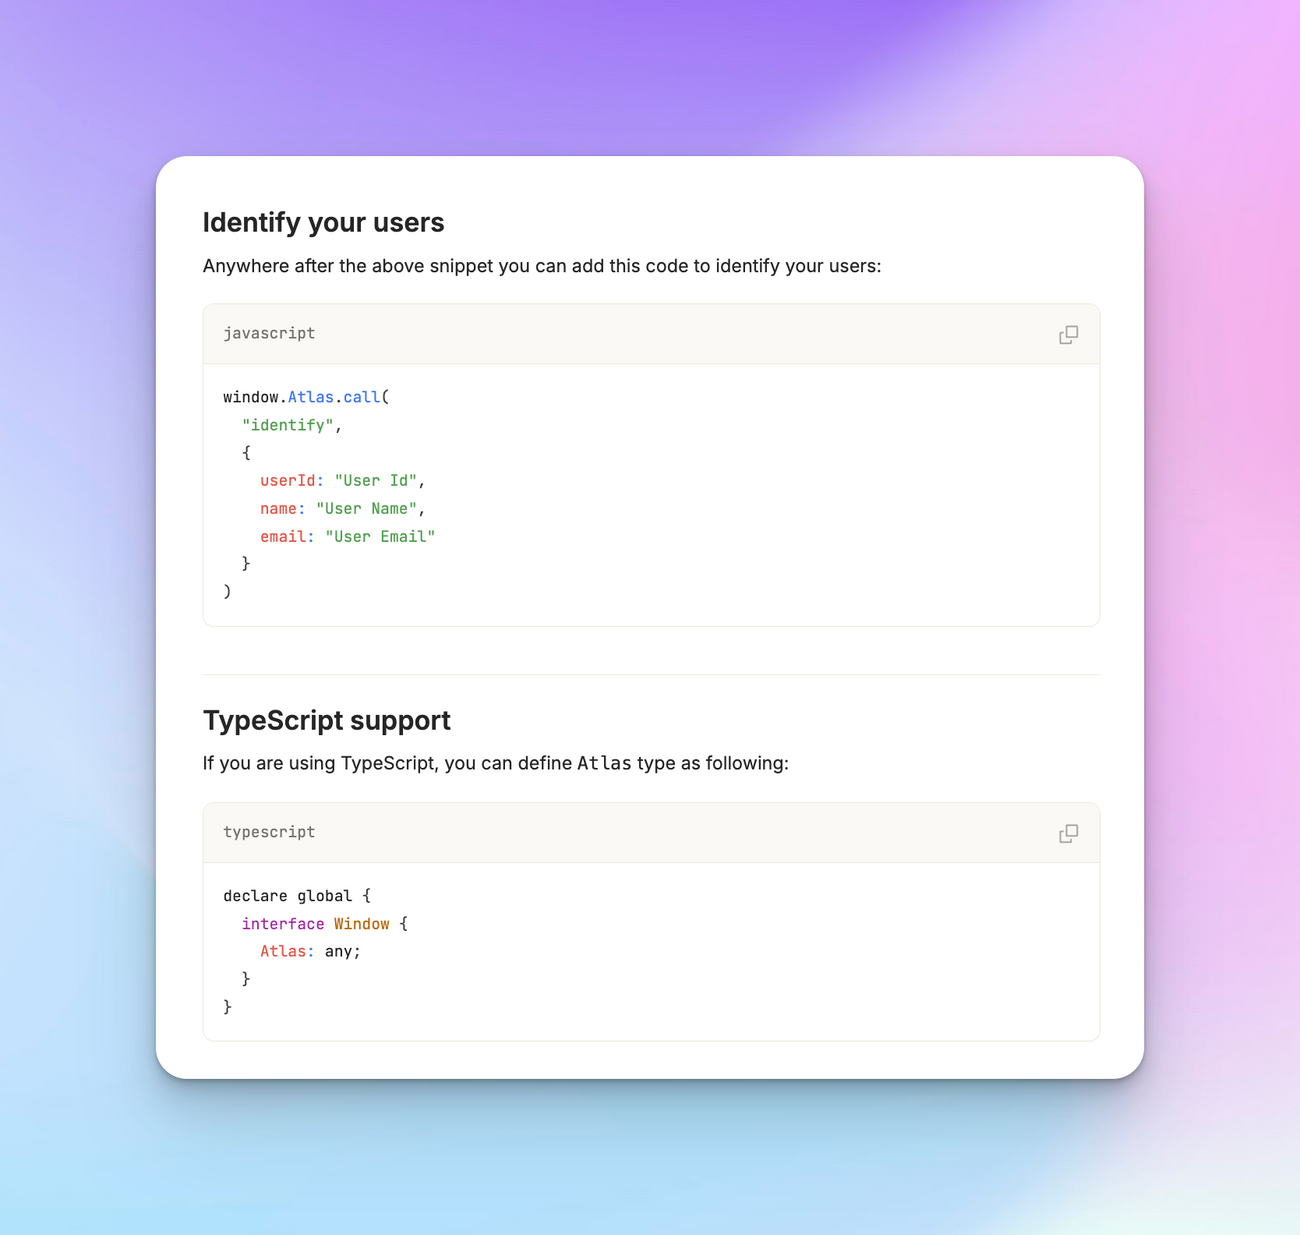
If adding to your application, you may want to pass user information to Atlas so it shows who is currently logged in.
Step 2: Configuring the chat widget
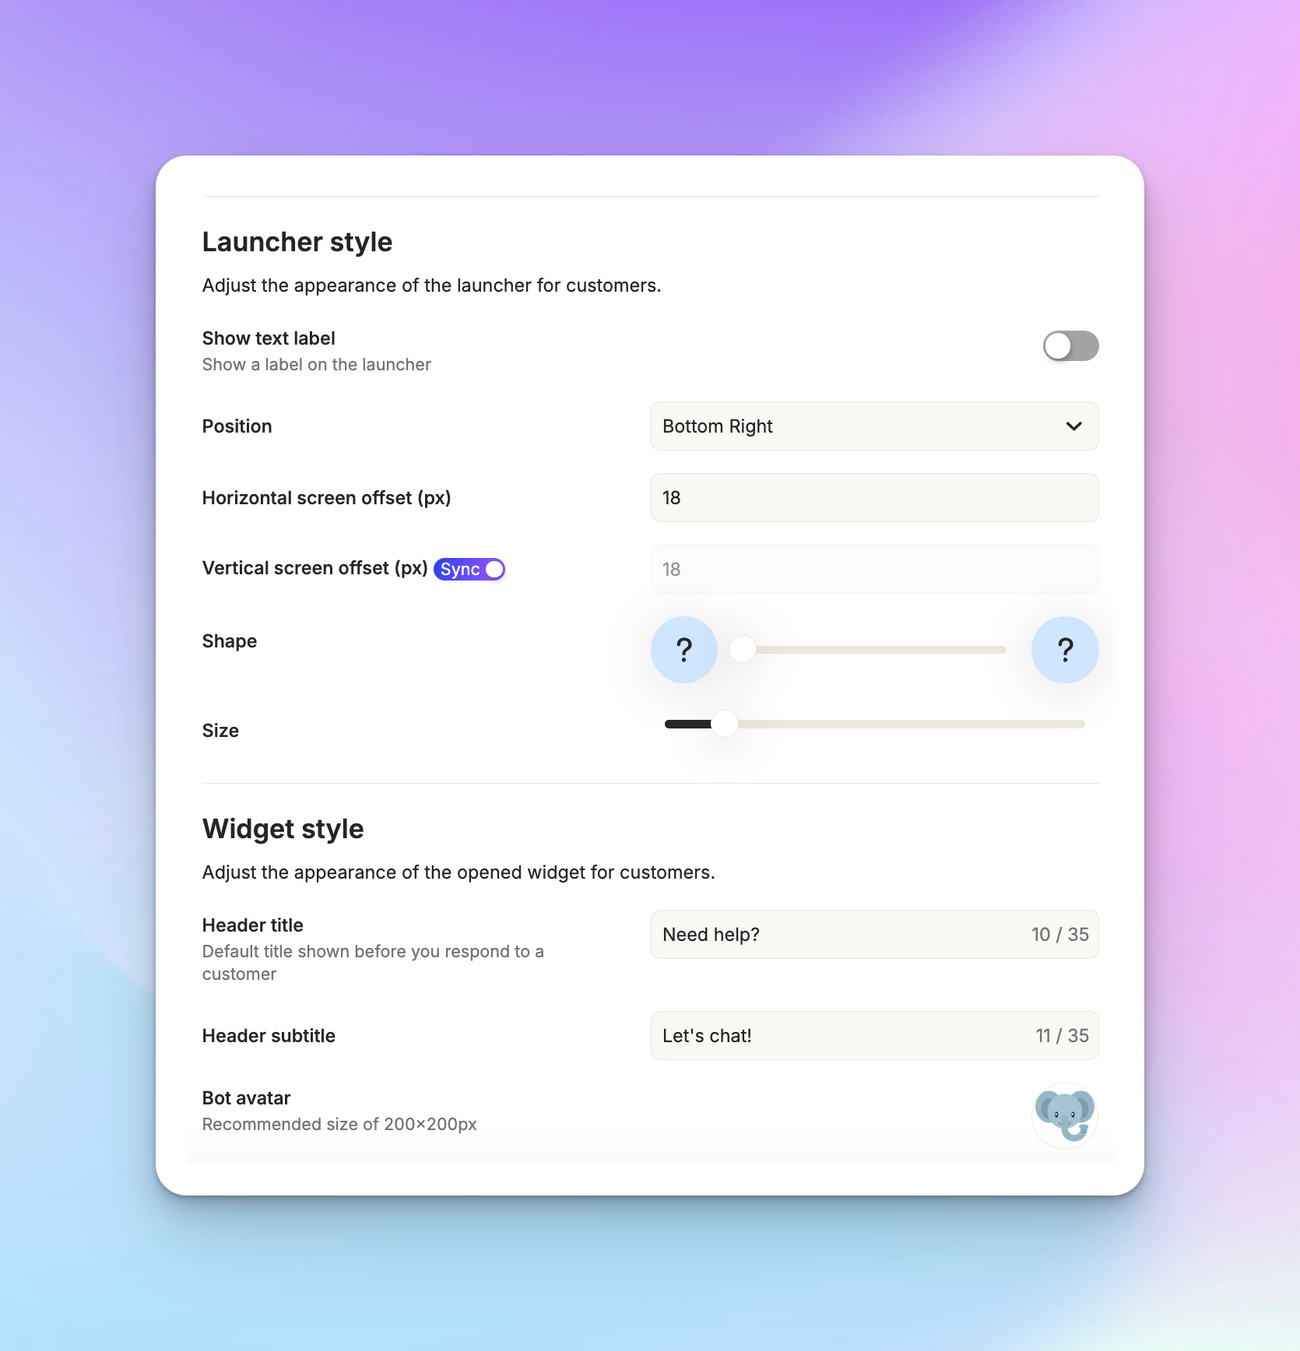
After installation, you'll want to configure various aspects of your chat widget, such as:
- Background color
- Widget placement
- Launcher shape
- Launcher size
For more information on these configurations, read our article on configuring the chat widget .
Step 3: Setting up email
Setting up email is a two-step process:
- Receiving emails in Atlas: Set up email forwarding in your provider to send emails to Atlas, where they become tickets.
- Replying from your domain: Configure your own sender, like support@atlas.so or support@acmeinc.com .
For more details on email setup, refer to our email ticketing article .
Step 4: Setting up slack
To quickly see and respond to messages in Slack, go to “ App Configuration > Integrations > Slack ”. Connect your Slack account via OAuth and set up your triage channel. We’ve covered all of this in detail here .
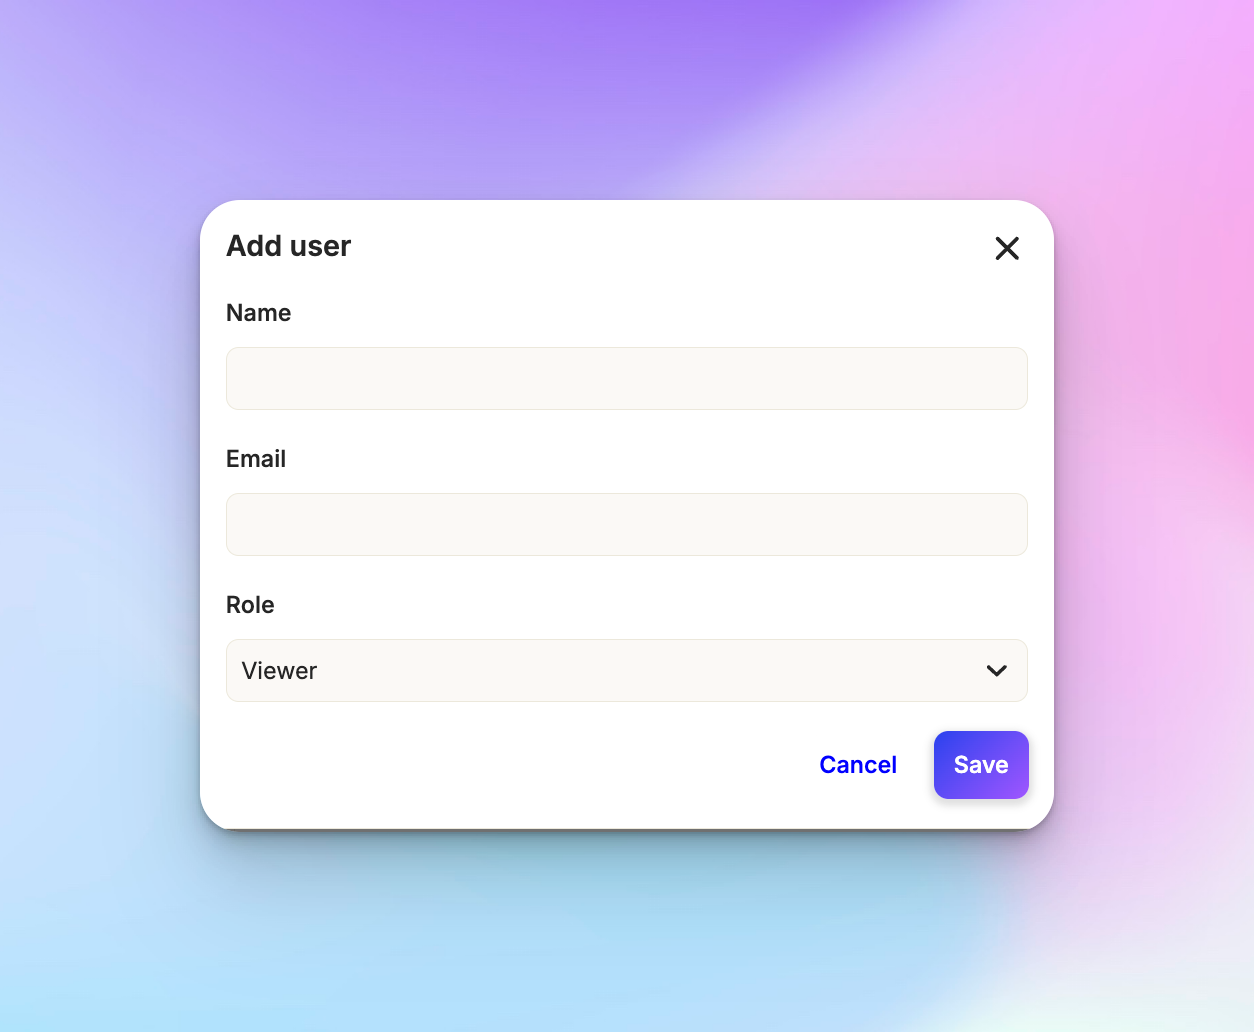
Step 5: Inviting teammates
To add team members for answering support questions, click on the hamburger menu and go to Settings > Team .
Invite teammates and set permissions.
For more information, read our article on managing teammates.
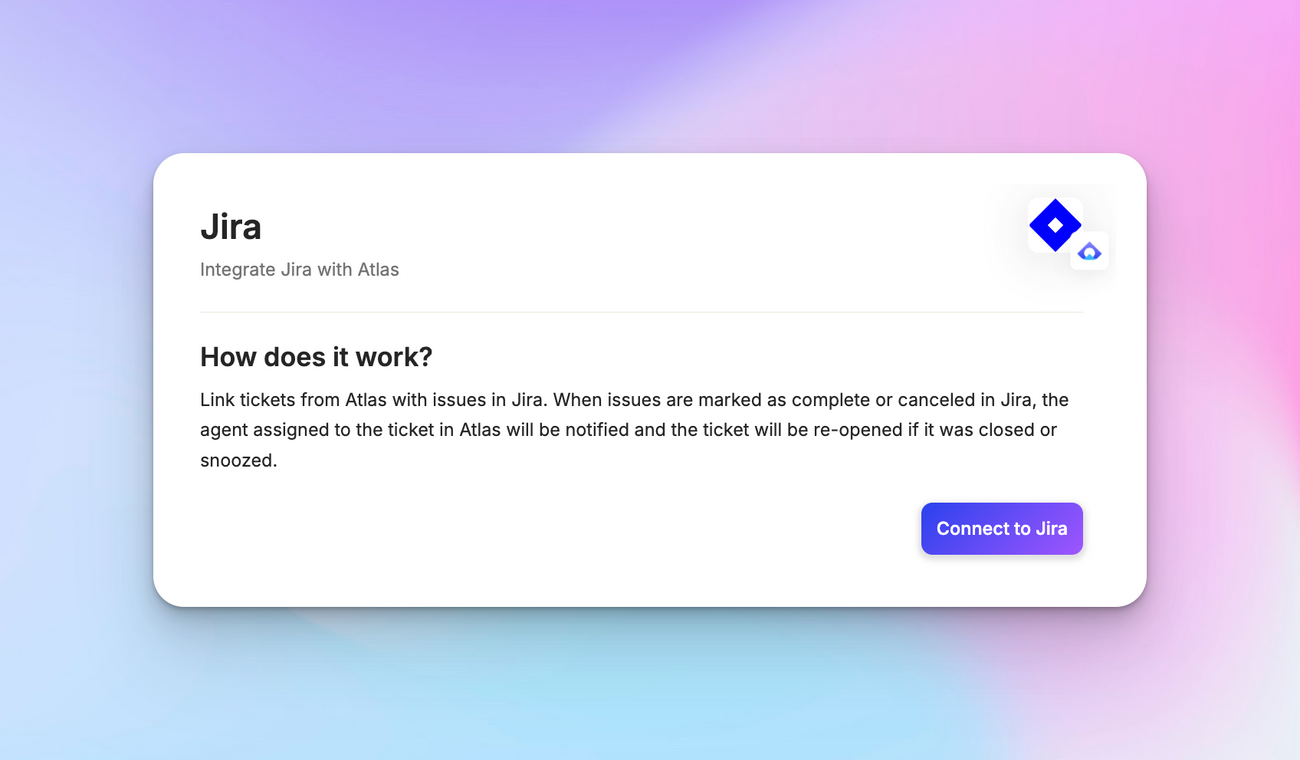
Step 6: Connecting project management tools
To track bugs and feature releases, go to “ App Configuration > Integrations > Jira ” and connect tools like Linear or JIRA.
Step 7: Connecting your CRM
To pull user data into Atlas, connect your CRM in the integrations section. Atlas will import and continuously update both company and account data
We hope this guide helps you set up Atlas effectively. For any questions, reach out to us at support@atlas.so .